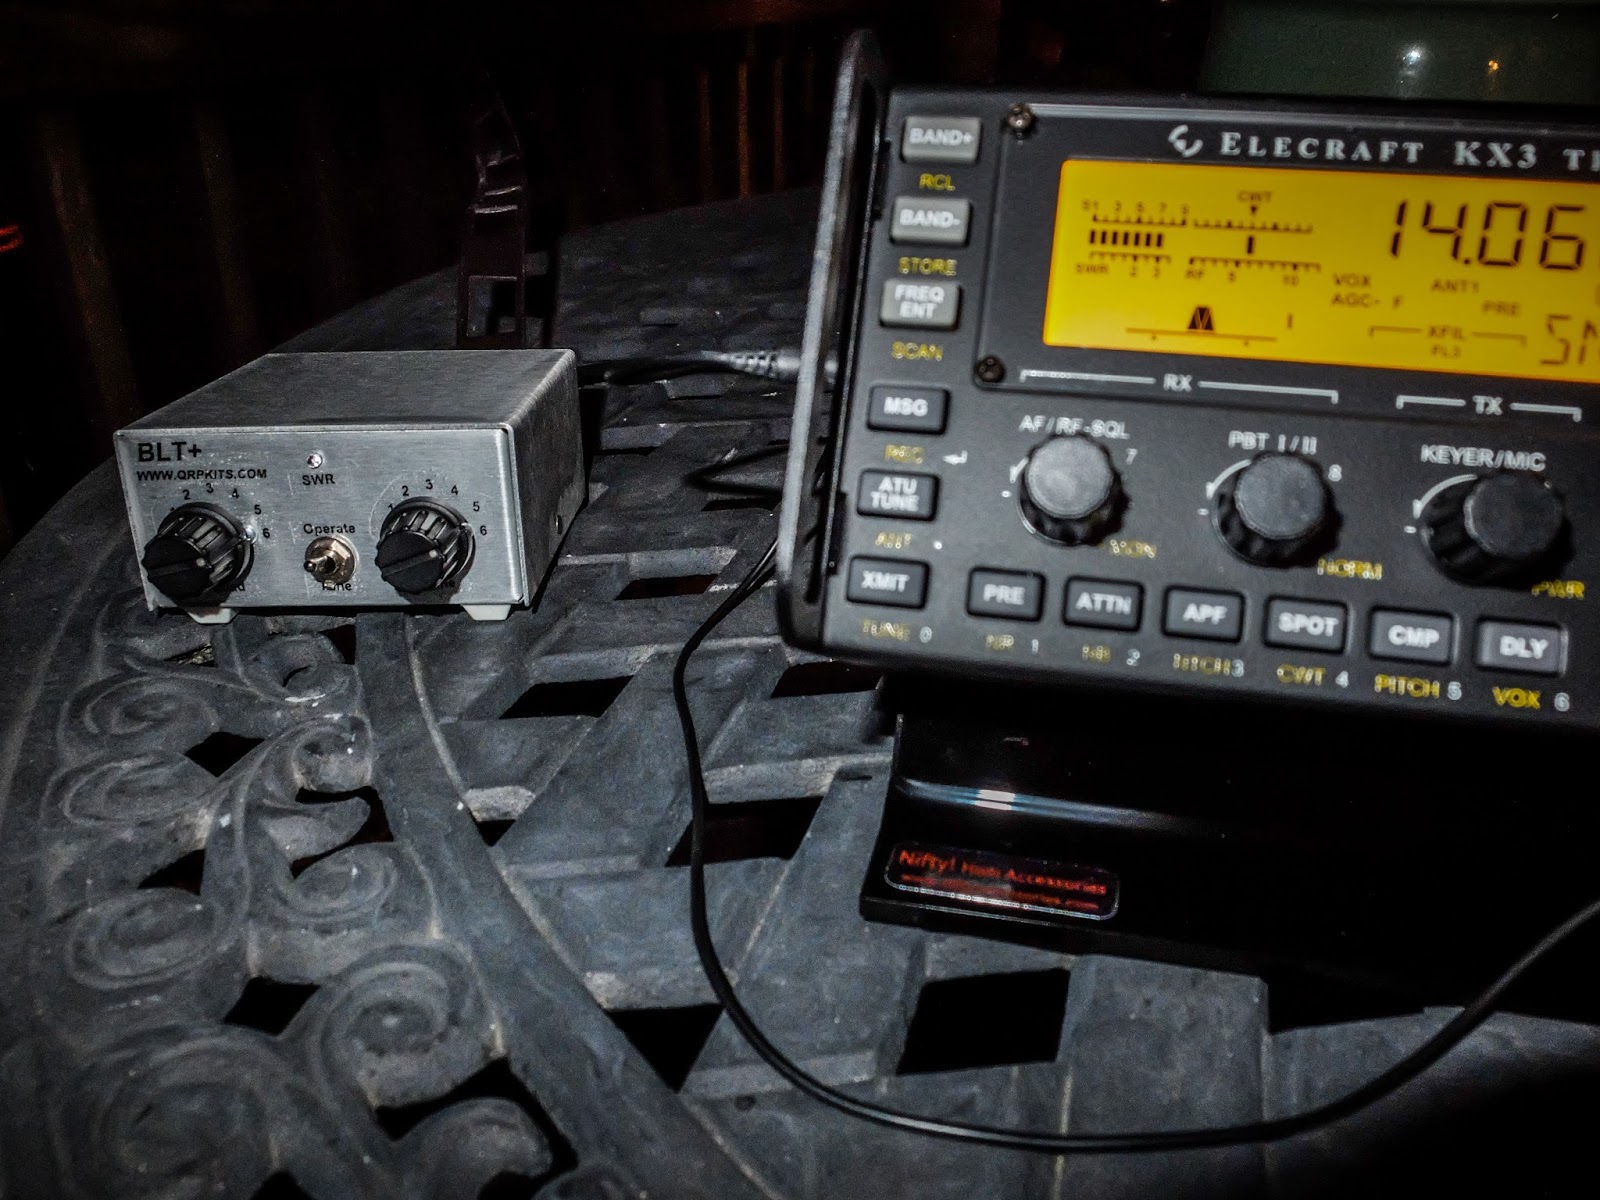
I wanted to test the BLT+ Tuner portable with a ladder line fed Doublet but my time has been limited. After getting home from work one night I assembled a 40m Doublet fed by 450 Ohm ladder line in my driveway.
I pushed the Doublet up on my Jacktite pole and attached the ladder line to the BLT+ and attached the BLT to the KX3. I had the KX3 sitting on the deck table running on internal batteries.
BLT+ tuning the balanced line antenna
By the time I began my test it was quite dark except for the moon. My headlamp was out of batteries and I was operating by a floodlight up on the eve but I was determined to know how the tuner worked with my portable doublet.
Doublet on Push up pole. Moon in the background.
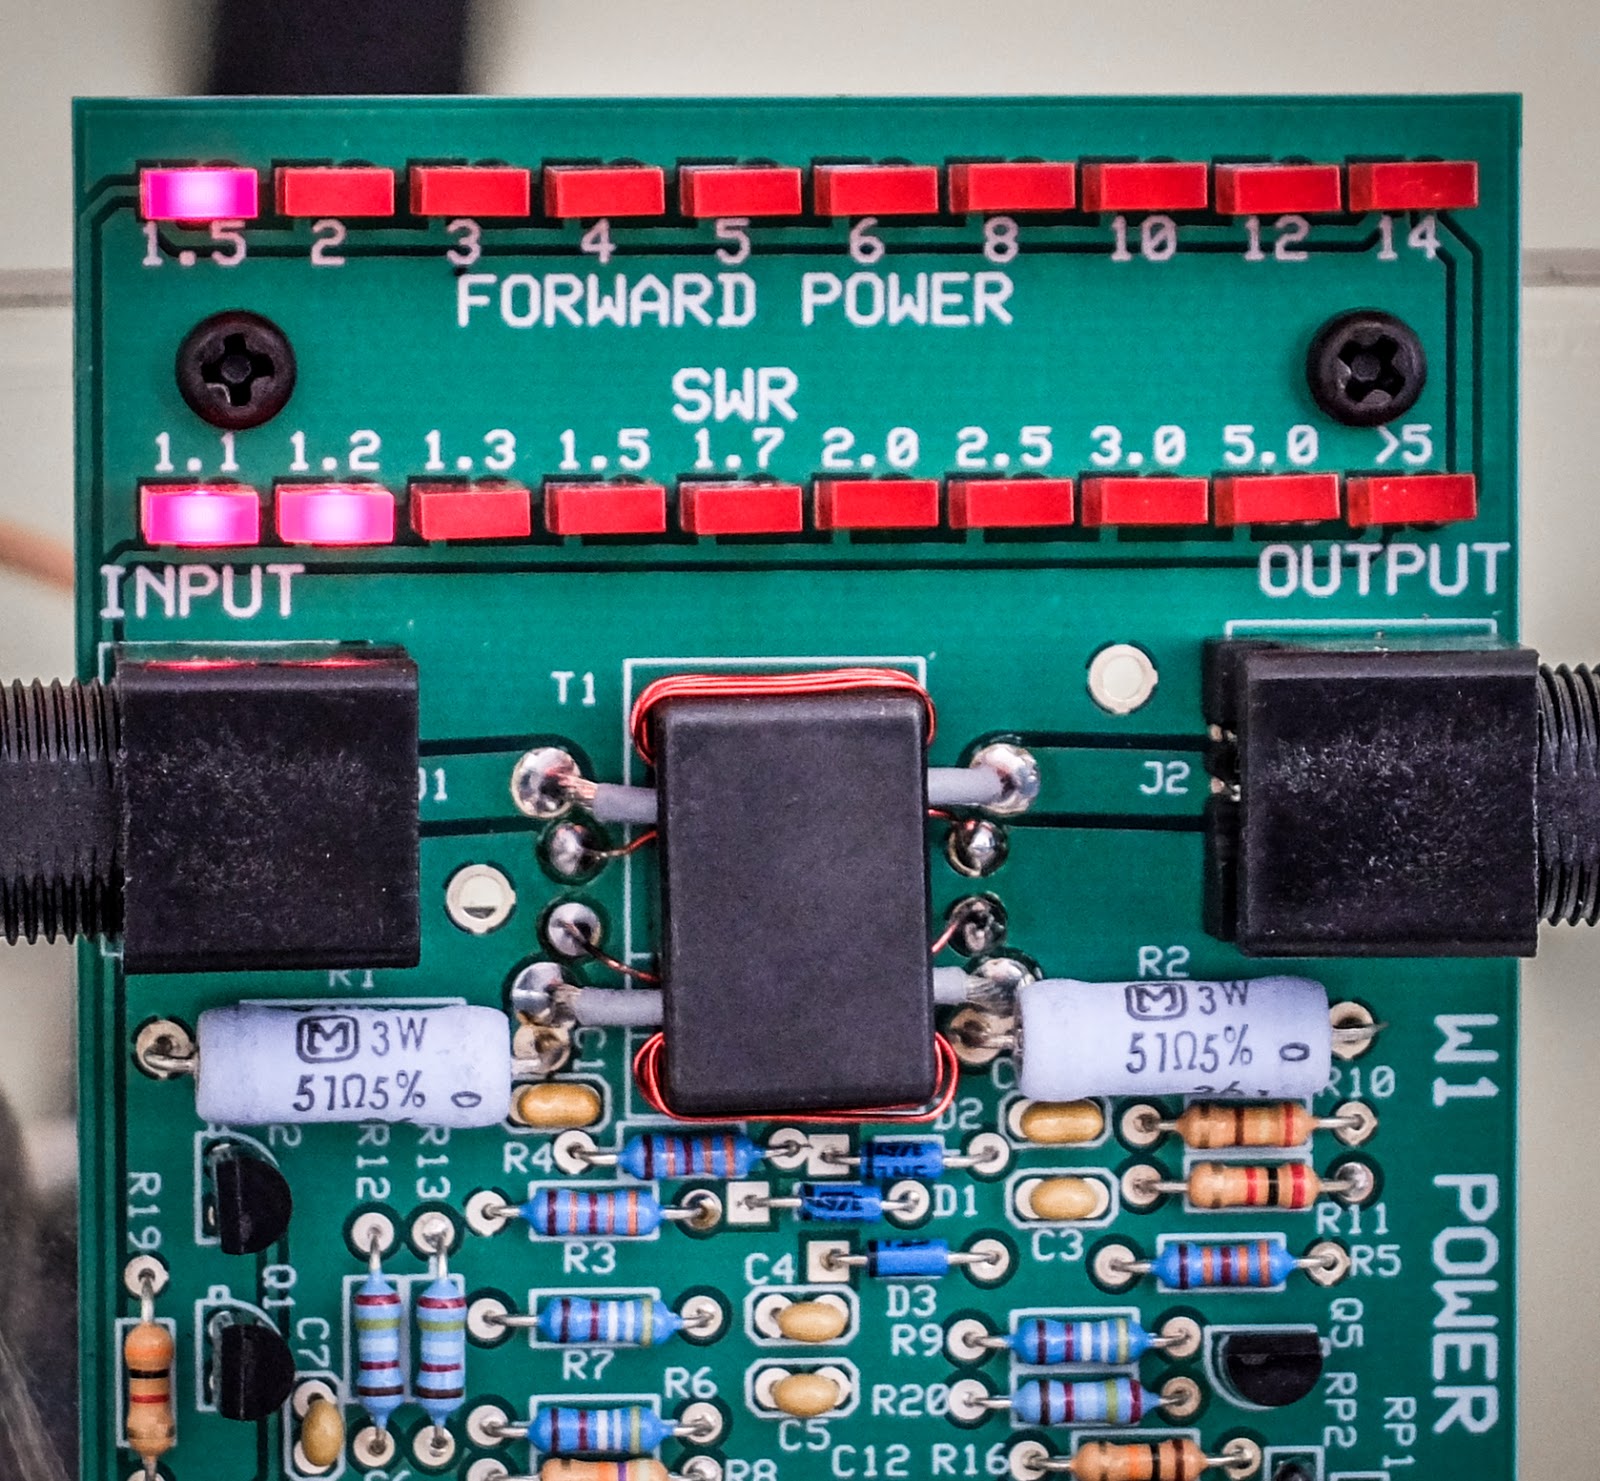
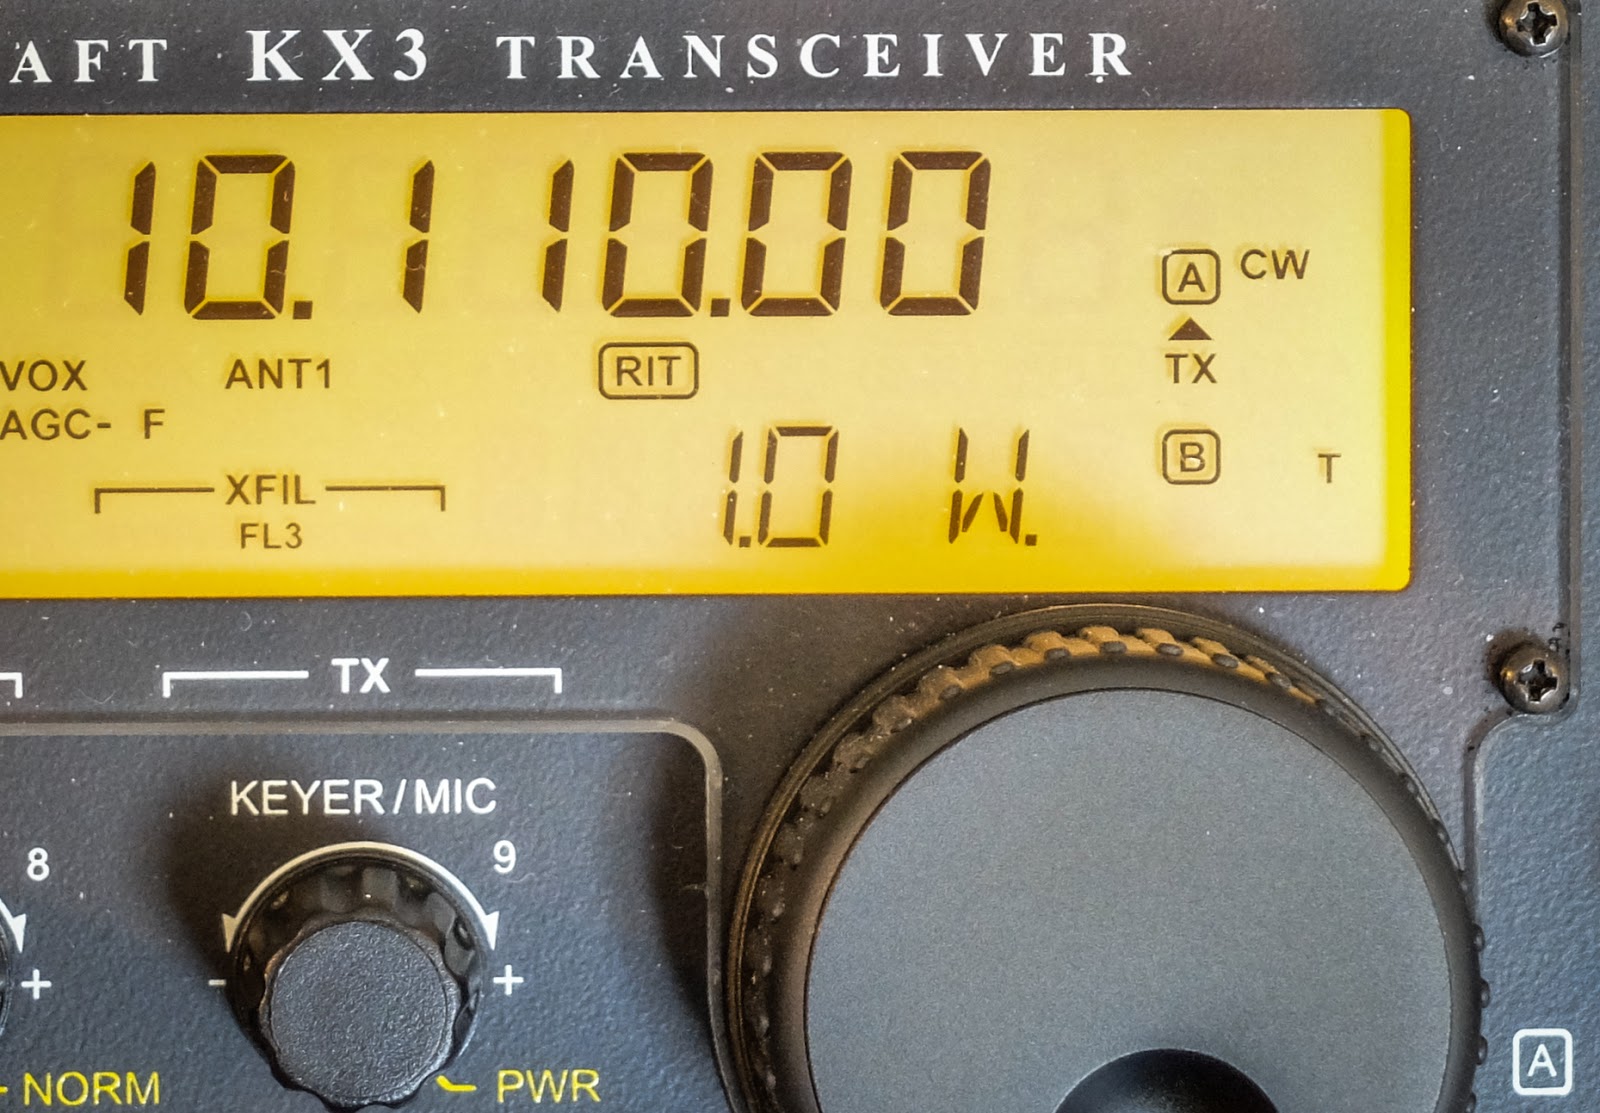
40m and 30m tuned up 1.0:1 using the high capacitance setting. Tuning was fast for each band using the SWR indicator LED. After tuning on 7030 and sending my call then again on 10110, I tried 14060. Although tuning 14m was a bit touchy it tuned using the low capacitance setting to around 1.5:1 SWR. After tuning I sent my call on 20m. Immediately I received a call from K7JHM, a QRP station in Utah (about 1700 miles away). We exchanged signal reports and station information although copy was a bit rough. I'd neglected to bring my earbuds out and the speaker on the KX3 is pretty poor.
However, the QRP to contact was a success on a portable antenna, tuned with the BLT+ driven by a rig running on internal double A batteries.
I didn't try higher bands because it was so late in the evening so I packed it all up declaring success.
Balanced line tuner doing it's job
Tuning 20m was a bit touchy because my total length of one leg of the doublet plus the feedline is too near a 1/2 wavelength on 20m. I need to add about 7 feet of ladderline to keep it from being near odd 1/8 wavelengths of the bands I want to tune. Or I could add 7 feet to each leg of the antenna. I will need to do that before the next test.
What does an S-Unit really mean and how can a QRP station sound like a 500w station?
The real gain doesn't come from transmitter watts
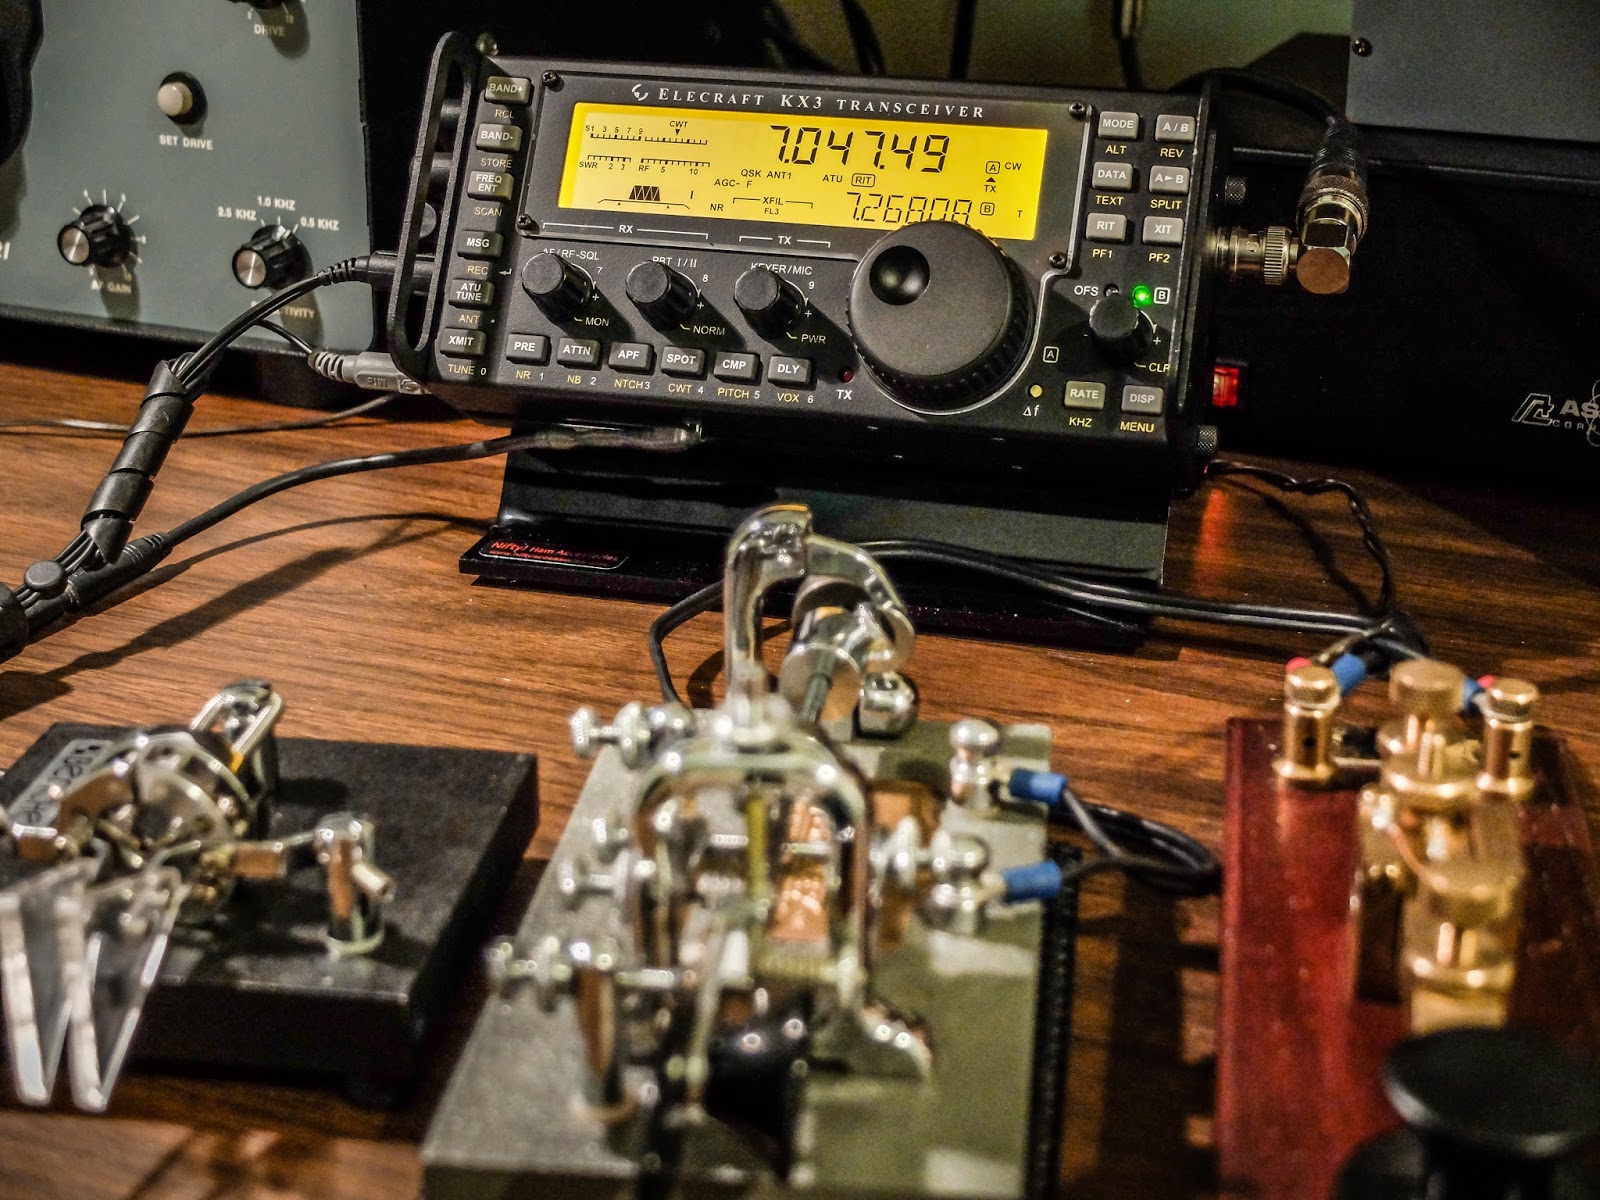
I rarely go up to the phone portion of the bands. Since I started doing QRP and CW last summer I think I've only made two SSB contacts just because my focus has been CW. But last night I was working on a bench project and tuned the Elecraft KX3 up to the phone portion of 40m for some entertainment.
A station in Rhode Island was testing his amp with a new antenna and was getting reports from various stateside operators. There was a lull where no one was answering his CQ so I thought I'd give him a call. He was peaking at S9 on my KX3's meter and he also sent me a signal report of S9 with some 10 over peaks. I then told him I was a QRP station running 10 watts and heard the usual surprised reaction from a QRO station.
I gave him reports as he switched back and forth from running barefoot ~75w to his amp ~500w. With his amp on he was an S9, running barefoot he was S8. So the amp gave him one additional S unit. In terms of hearing him I would have been hard pressed to tell much difference simply by volume. He was perfectly copyable without noise with the amp off.
We also did some tests with my station at reduced power (as if...) At 10w-12w output I received a S9 to S9+10. Reducing output to 5 watts netted me a S8 report and when I reduced to 1 watt (one watt) he was still able to comfortably copy me and I received an S5. So with my station at 1 watt and his running 500 watts we could still converse via SSB. Ladies and Gentlemen you don't need as much output wattage as you think you do.
He was running through a newly constructed homebrewed vertical while I was using my 80m OCF Dipole. We didn't discuss what sort of radial system he had installed, but the difference in antennas was likely the deciding difference in our stations. We were about 500 miles apart and his vertical probably had more low-takeoff gain than my dipole, or possibly more ground loss so I probably had better high angle gain on him for the short 500 mile skip. I think the take-away from this exercise is that the antenna is generally the key rather than transmitter power. If I can get 6 dB of gain from my antenna I have in essence quadrupled my effective radiated power. Quadrupled? Yes, Quadrupled effective output power.
Power and S-Units
You've probably heard it before but it's worth a refresher... Our radio's meter display a measurement in "S-Unit". To move the meter up one S-Unit the receiver must hear 6 more dB (decibels). So one S-Unit is 6 dB.
A decibel is:
A Power Ratio: dB = 10 Log P2/P1
A Voltage Ratio: dB = 20 Log V2/V1
You increase 3dB each time you DOUBLE your power
That's worth repeating...
You increase 3dB each time you DOUBLE your power. So to gain one S-Unit you must quadruple your power.
So if you are running 100 watts, to gain one S-Unit using the same antenna system you must increase your power to 400 watts. If you are running QRP SSB (10 watts) that is only 1.5 S-Units down from 100 watts. 100w / 2 (-3dB) = 50w / 2 (another -3dB or 1 S-Unit) = 25w... etc.
Antennas offer the cheapest increase in dB
Note the statement above "using the same antenna system". That's the key then isn't it? It's easier to get 6 dB of gain from an antenna than from wattage. A 40m doublet can offer significant directional gain especially when operated on higher bands. Now unless it's rotatable you will be at the mercy of the directionality of its lobes but if you have trees or tall structures you can very cheaply string up a few dipoles oriented in different directions and for far less money that a 500 watt amp (6 dB). If you can only have one wire antenna you may miss out on some DX in the antenna's nulls but you will have some stellar gain in the direction of the lobes. Of course rotatable yagis and beams are the best but now we are talking about real money again. I'm talking bang for the penny. You don't have to buy a wire antenna. Some Dacron rope or weed-eater line and some surplus insulated wire is all you need. You can even make your own feedline cheaply from electric fence wire and insulators.
We have a great hobby, but there are so many aspects of it that sound like common sense when they really are not... like increase your power.
Increasing power gains you very little compared to a better antenna systems.
That's all for now.
So lower your power and raise your expectations (or your antennas)
72/73 (Note: 72 is a common substitute for 73 among QRPers... as in "not enough power for 73")
Richard, N4PBQ
You can't always get what you want, but you try sometimes...
Recently I've dialed my normal 5 watts down to 1watt (one watt, singular) for all my contacts. To throw some water on the fire I've decided to use my attic antenna which weaves all around my metal ductwork and electrical wiring. Mostly this was to prove a point to myself but it may be enlightening to deed restricted hams that they can use a qrp radio and an attic antenna successfully.
Key lineup... Palm Single (paddle), Vibroplex Bug (circa 1970s), Kent Hand key
It only seems pointless until you try
Calling CQ with 1w QRPp into a poor attic antenna isn't as pointless as it would seem. I didn't have to wait long when calling CQ before I got an answer most of the time.
Now am I going to bust a pileup with 1 watt ? Possibly not but I think that my assumptions about both how much power I need and how big an antenna I need are usually out of proportion with reality.
1 mighty watt
My assumptions are often incorrect
I made QSOs on 30m, 20m, 17m and 10m this morning all at 1 watt. The solar conditions report was not really fantastic, especially for 10m. Yet 1 watt through the attic antenna bagged the only DX I heard on 10m. I had a couple of other multiple exchange contacts on 20m, 17m and one good old fashioned 25 minute long ragchew on 30m where I received a 599 report for my one watt from Bob (NR8M) in Ohio. Admittedly, Bob was booming in and we had good propagation to each other.
The recording below was number 4 or 5 this morning. I wanted to post this one because I was working another QRP station in Arkansas (K5EDM) and we did NOT have great propagation to each other. He was running 5w while I was running 1w so it was QRP to QRPp. In the video you can see that I'm using some of the KX3's tricks to pull the signal up because there was a lot of QSB and noise (note the GEOMAGNETIC FIELD UNSETTLED in the solar report).
I had the volume maxed and was using the RF gain control mostly. I eventually had to turn on the preamp which really washed me in noise but I dropped the RF gain more and eventually switched in the APF (audio peaking filter) which performed magic on this contact. Often I find that APF doesn't help but this time it made a big difference.
I've been considering ordering a 1 watter kit but I was concerned that it wouldn't be useful in the downward sunspot cycle.
1Watter board with initial 100nf caps installed and starting inventory of other parts. Not shown are the myriad toroids (fun, fun), transistors and pots.
So I spent some time this afternoon making 1 watt contacts on 20m and 40m with my Elecraft KX3 just to see what staying limited to that power would be like. I've made casual 1w contacts in the past but staying at 1watt was a good test for me.
It turned out that I had a plenty of answers to my 1 watt CQ calls and received reports that were only one or two points down from my report to the calling stations. The last station I worked dropped down to 300 milliwatts and I still copied him fine.
So I ordered a 1 watter kit for 40m from Kits and Parts today.
The 1 watter kit is significantly more involved to build than the Elecraft kits I've assembled to date. I hope to learn a lot from the build and alignment and I just might finally have a reason to buy an oscilloscope (hopefully my wife doesn't read this).
Update 2/20/2016: I received the kit yesterday. It includes 21 100nf SMT capacitors that the builder "highly recommends using". Optionally he supplies through-hole capacitors. I tried figuring out hold to hold the SMT part in place to solder for about 30 minutes and gave up. I don't have 3 hands. I'd have to have someone show me how to solder an SMT part. Even in the linked video to building the kit the builder used the through hole components so I don't know why the SMTs were supplied or were highly recommended. So I used the through hole capacitors.
Through hole versus SMT capacitors
I couldn't figure out how to solder the tiny SMT capacitors
1watter board with the 21 through hole 100nf caps installed
Inventory of resistors
Next step was installing resistors. There are six 1/8w resistors missing in the kit:
R3,9,21,22 (470)
R12 (1.2K)
R14 (4R7)
I haven't built enough kits to have spares like this so I sent them a note and will see how long it takes to get the resistors. I haven't inventoried the rest of the parts yet but so far I'm a bit disappointed. I have built 4 kits from Elecraft and one from 4-State QRP and all of those kits had all the parts. Although in the case of 4-State QRP one of the plastic knobs was broken in shipment. They sent me another in 3 days.
My Elecraft KX3 is an incredible radio in many ways. It's small size makes it a marvel for portable operations.
The upward facing display of the KX3's short legs is ideal for remote, portable operations
But on the desktop it's short stuff
But for desktop operation the short rear legs make for a laid back angle that makes the display difficult to see and the buttons awkward to operate. I home brewed a stand that I've used for the past few months. It angled the radio more vertically but it was still low to the desk.
The KX3 on my homebrew stand
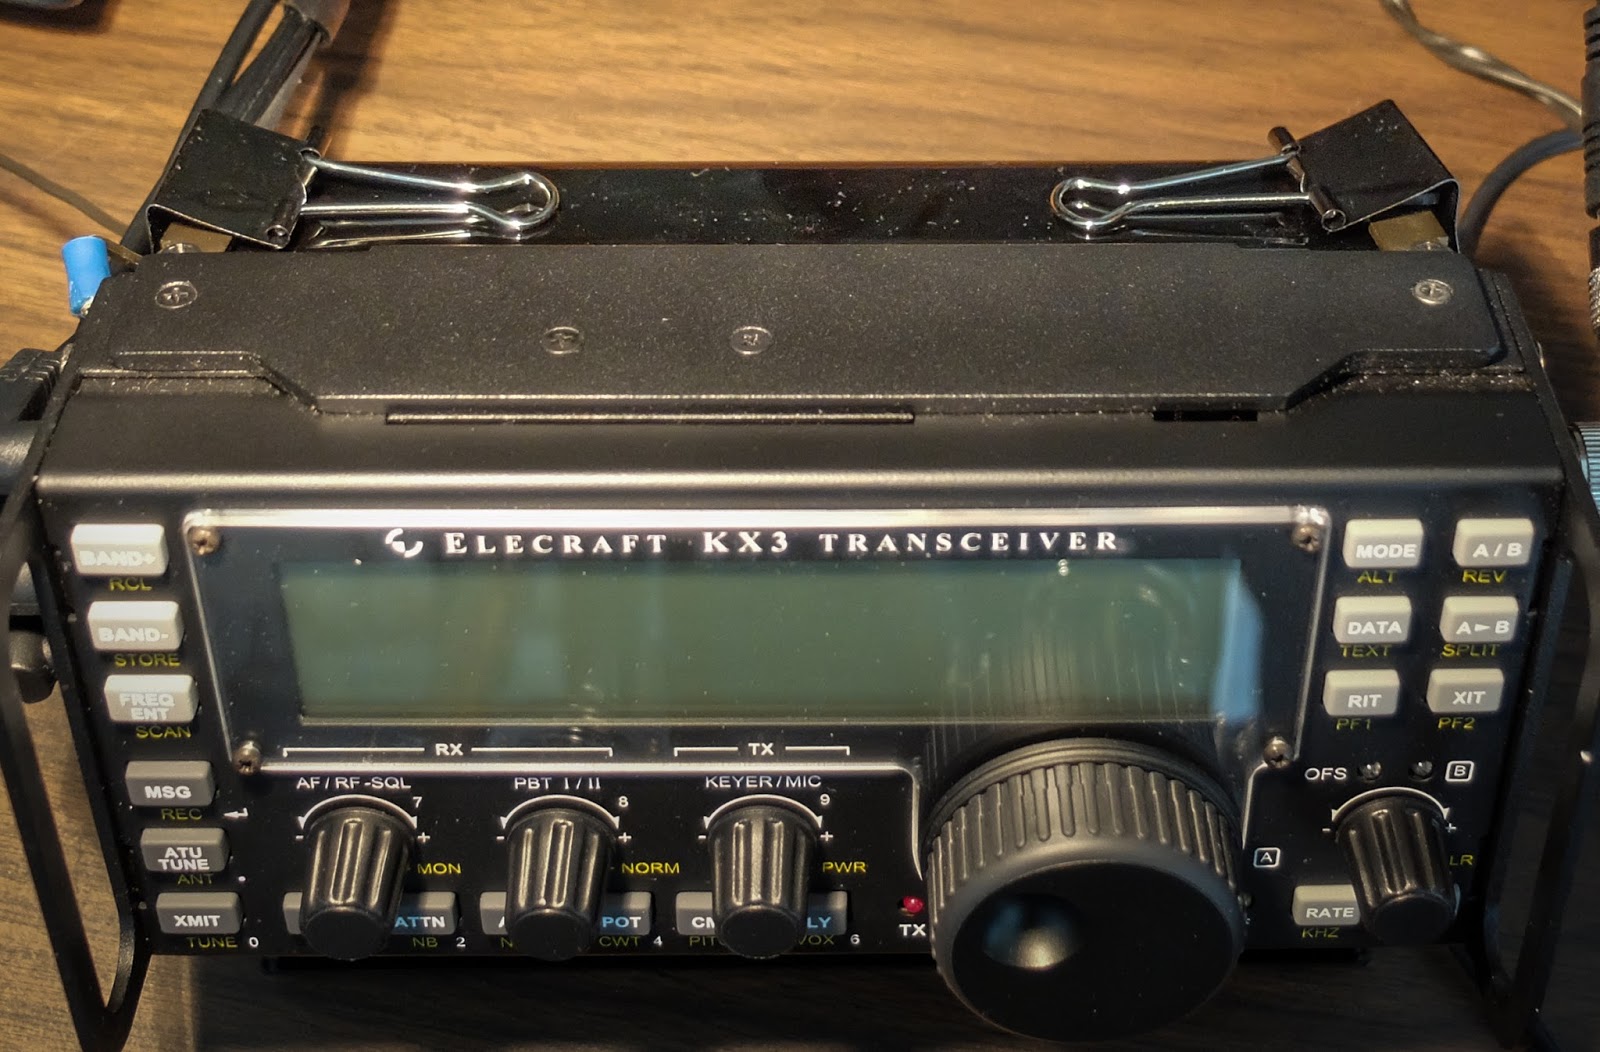
The KX3 "Iron Throne"
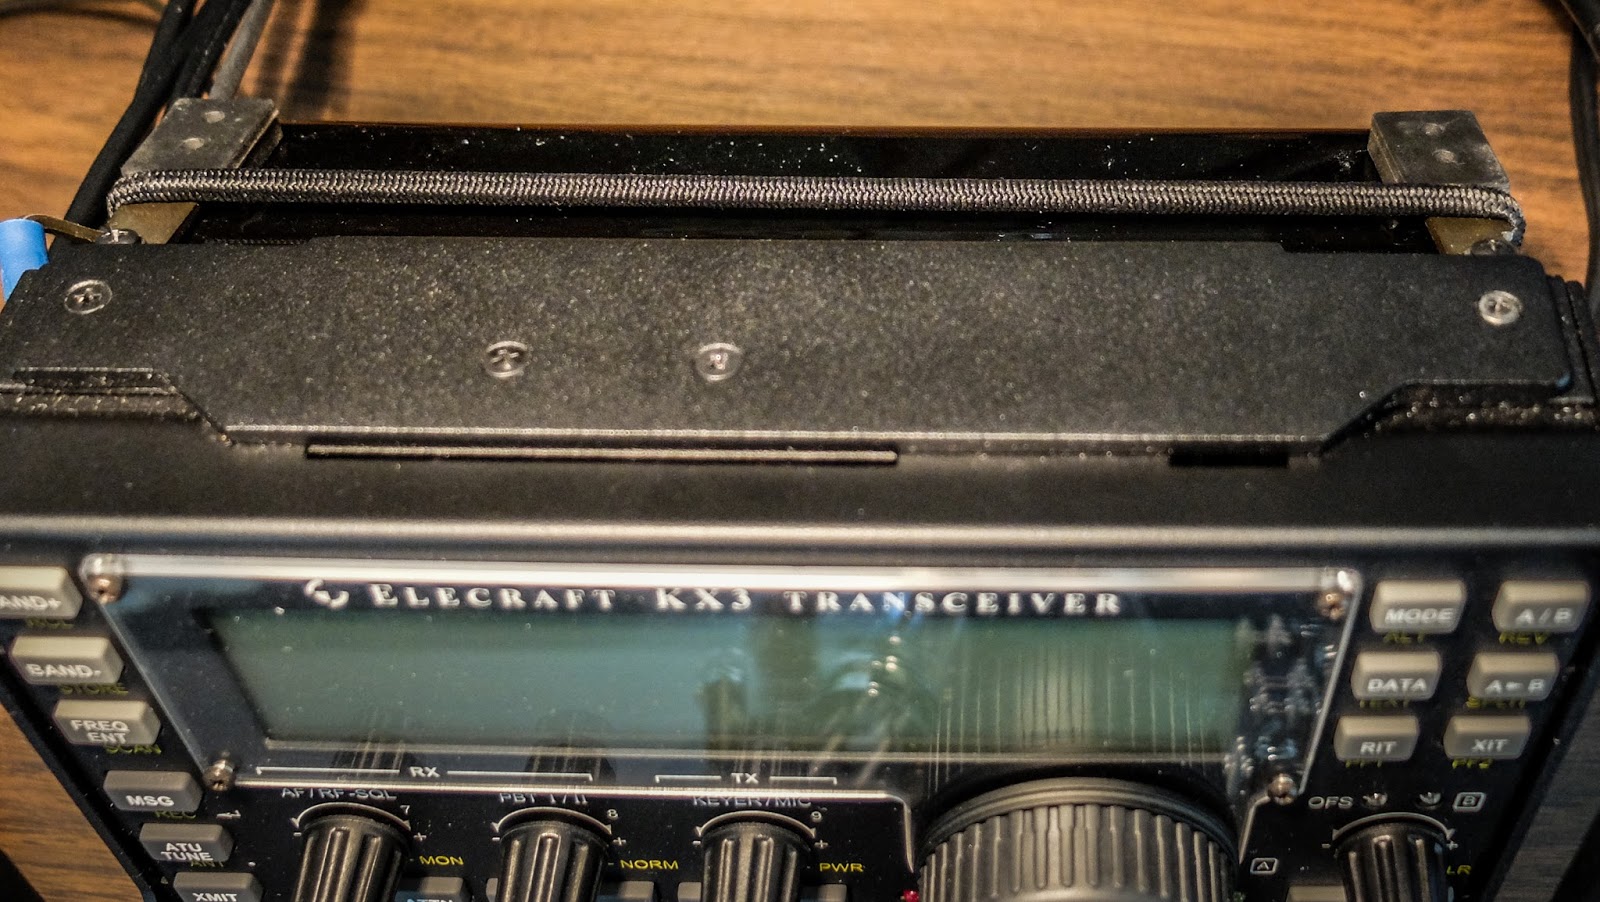
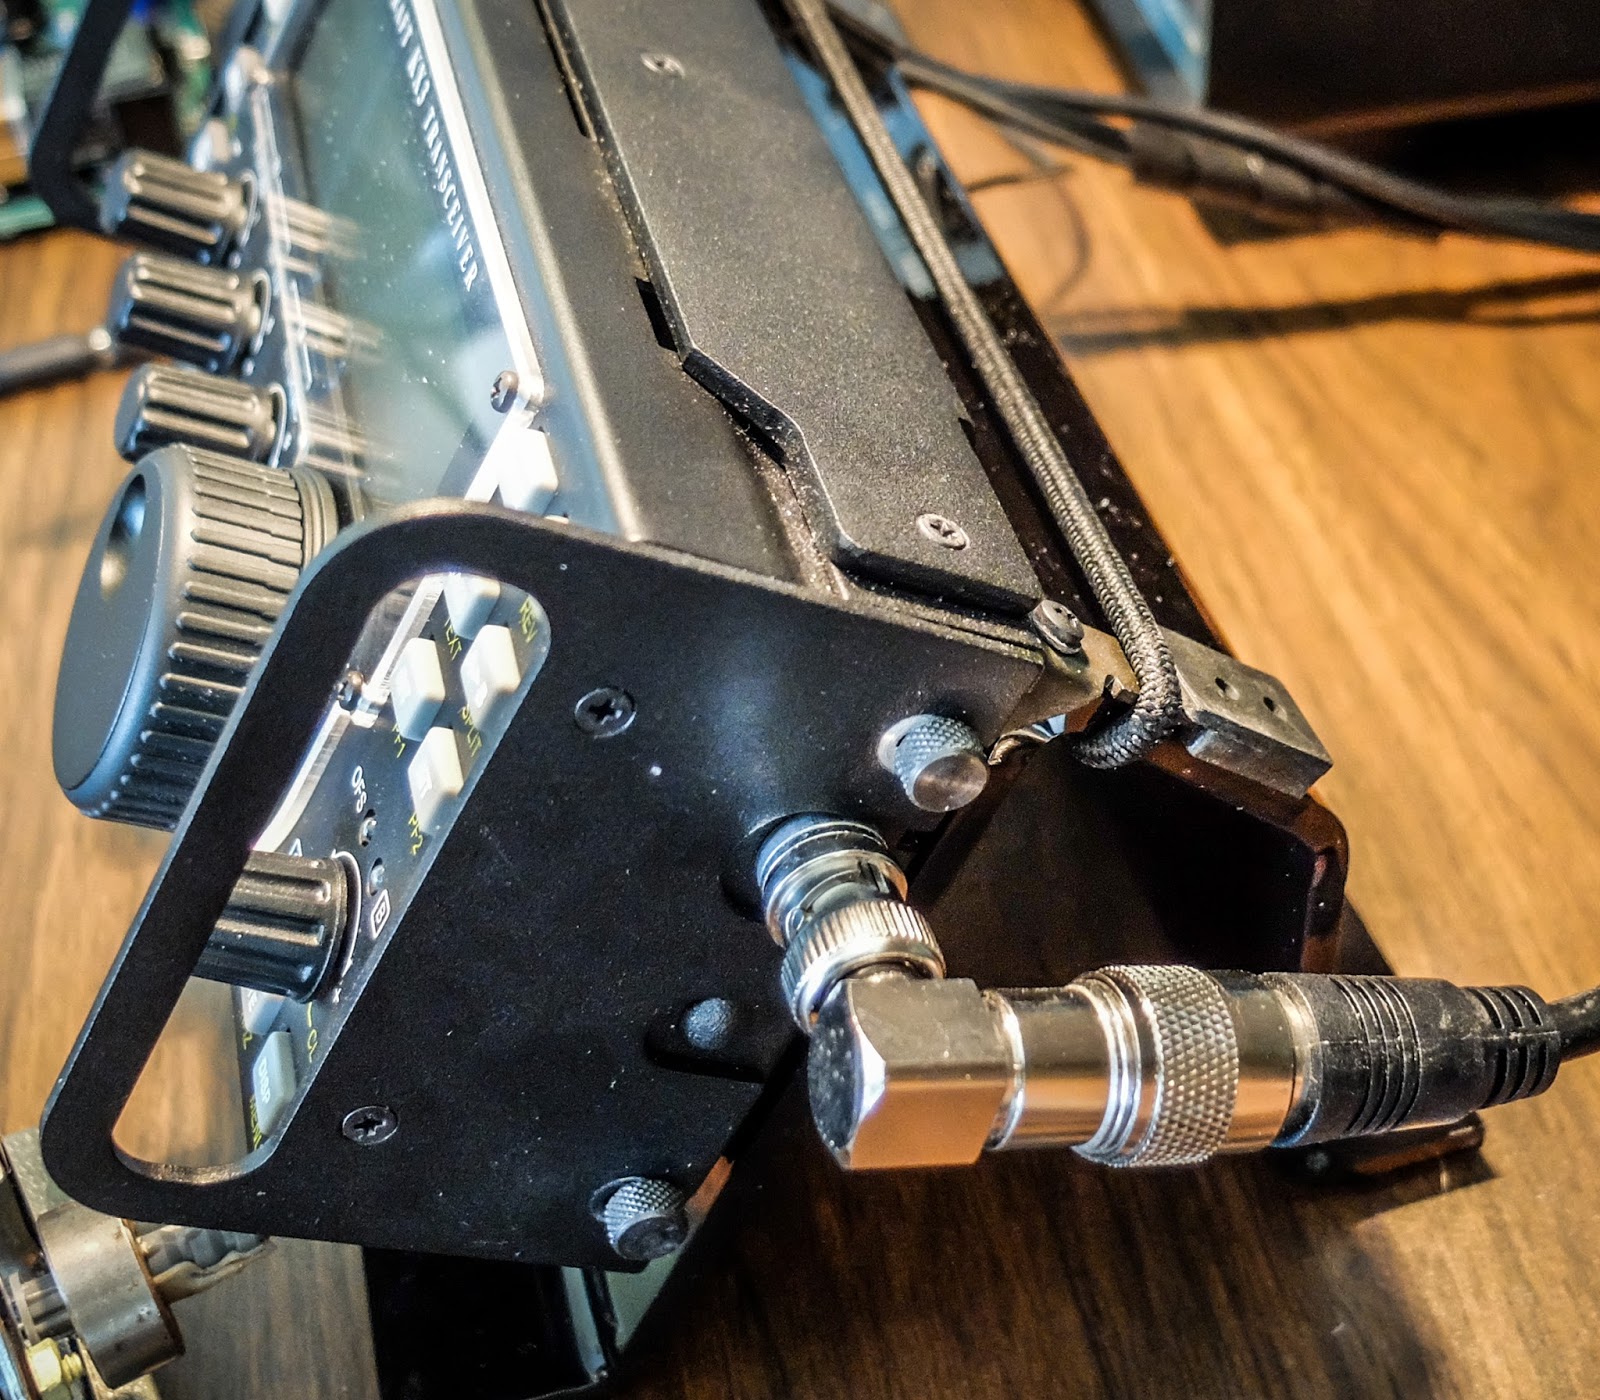
I finally felt it was time to give the KX3 some love and give it a proper throne chair for its little princely demeanor. The KX3 now has some height and sits more vertically. Access to the face of the radio is much improved.
Here's a closer view...
If you have a KX3 and use it on a desk in the shack the Nifty Accessories stand is a solid addition to improve the ergonomics of your little jewel. It can be ordered with enough space to clear an attached paddle or lower to the desk if you prefer but I wanted the additional height to get it above some of my taller keys.
One Suggestion... replace the paper clips
The stand comes with big paper clips to hold the KX3 to the stand. They are a a bit difficult to properly attach with all the cables exiting the KX3 on the left hand side and they look ugly.
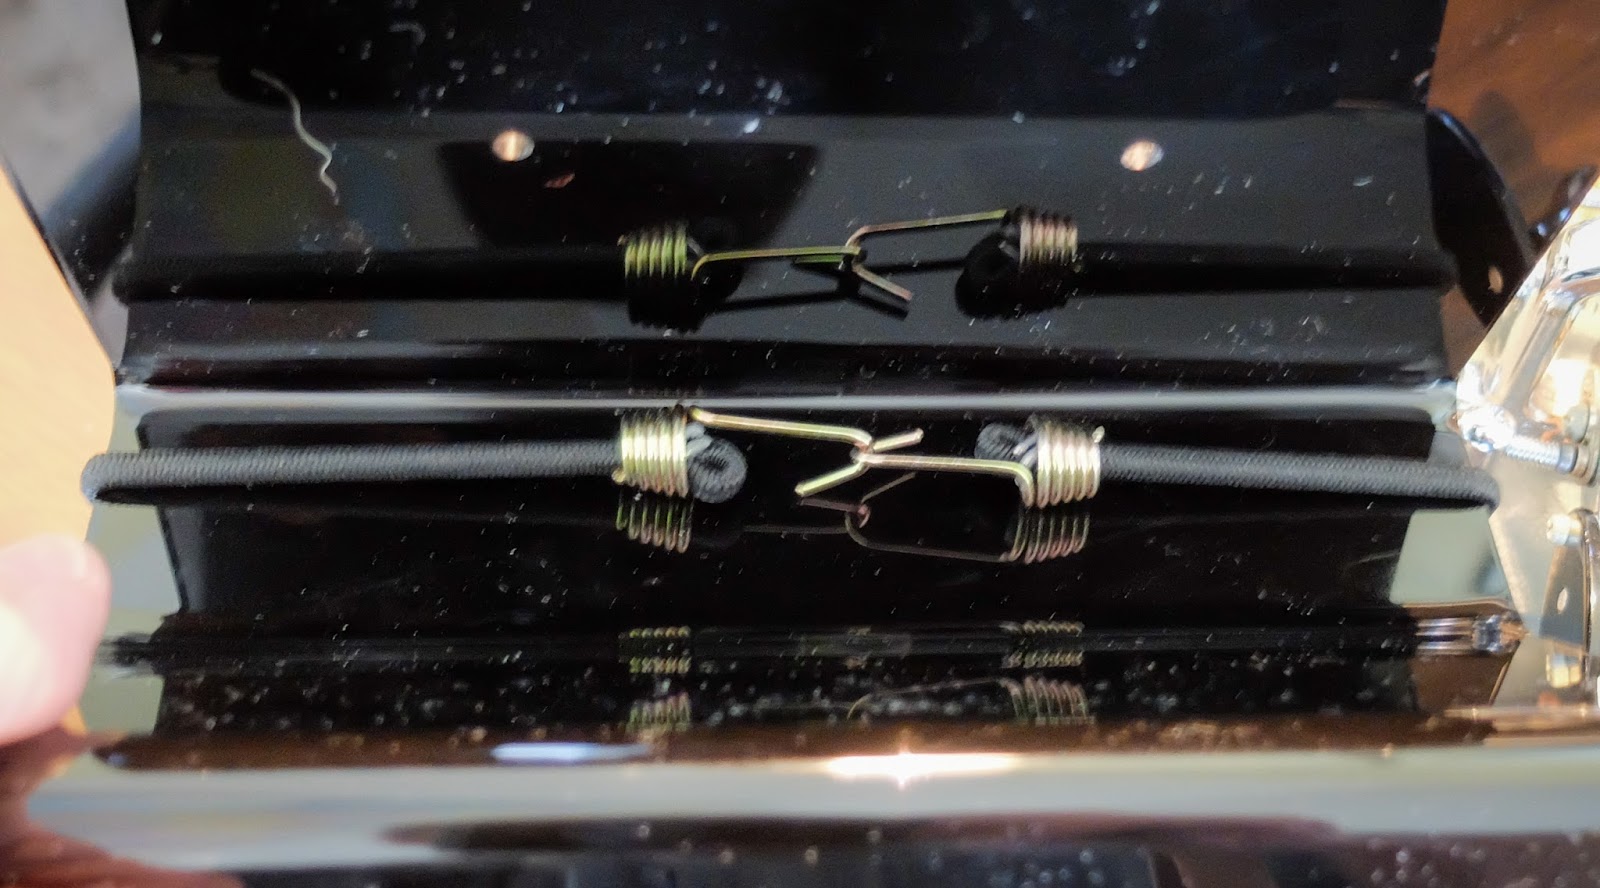
I replaced the two paper clips with a small bungee cord which I attach as a loop across the top of the stand. The bungee cord connects to itself underneath the stand...
The feet of the KX3 then slip under the bungee cord. It seems to hold it sufficiently and is easier to attach and remove the radio. It looks nicer as well...
My burgeoning QRP station was getting messy, having stuff strewn all over the desk, so I made a shelf from some junk laying around to give me some vertical space. It is much more organized now.
A shelf helps
Left to right top shelf:
Ozark Patrol Regen Receiver Kit, MFJ Versa Tuner providing both tuning and antenna switching duties, Two Position Rig switch on top (blue box), Ham Keyer (circa '78) electronic keyer
Left to right under shelf:
Yaesu HT connected to home-brew J-Pole in attic, two switching power supplies, VHF/UHF meter, Elecraft KX3, Ten-Tec Century/21 (circa '77), Homebrew frequency counter on top of TT)
Three keys:
Bencher paddles, Vibroplex Bug, Kent Hand Key
That's all for now.
Operating QRP
Can mean operating from a "Quiet Restful Place"
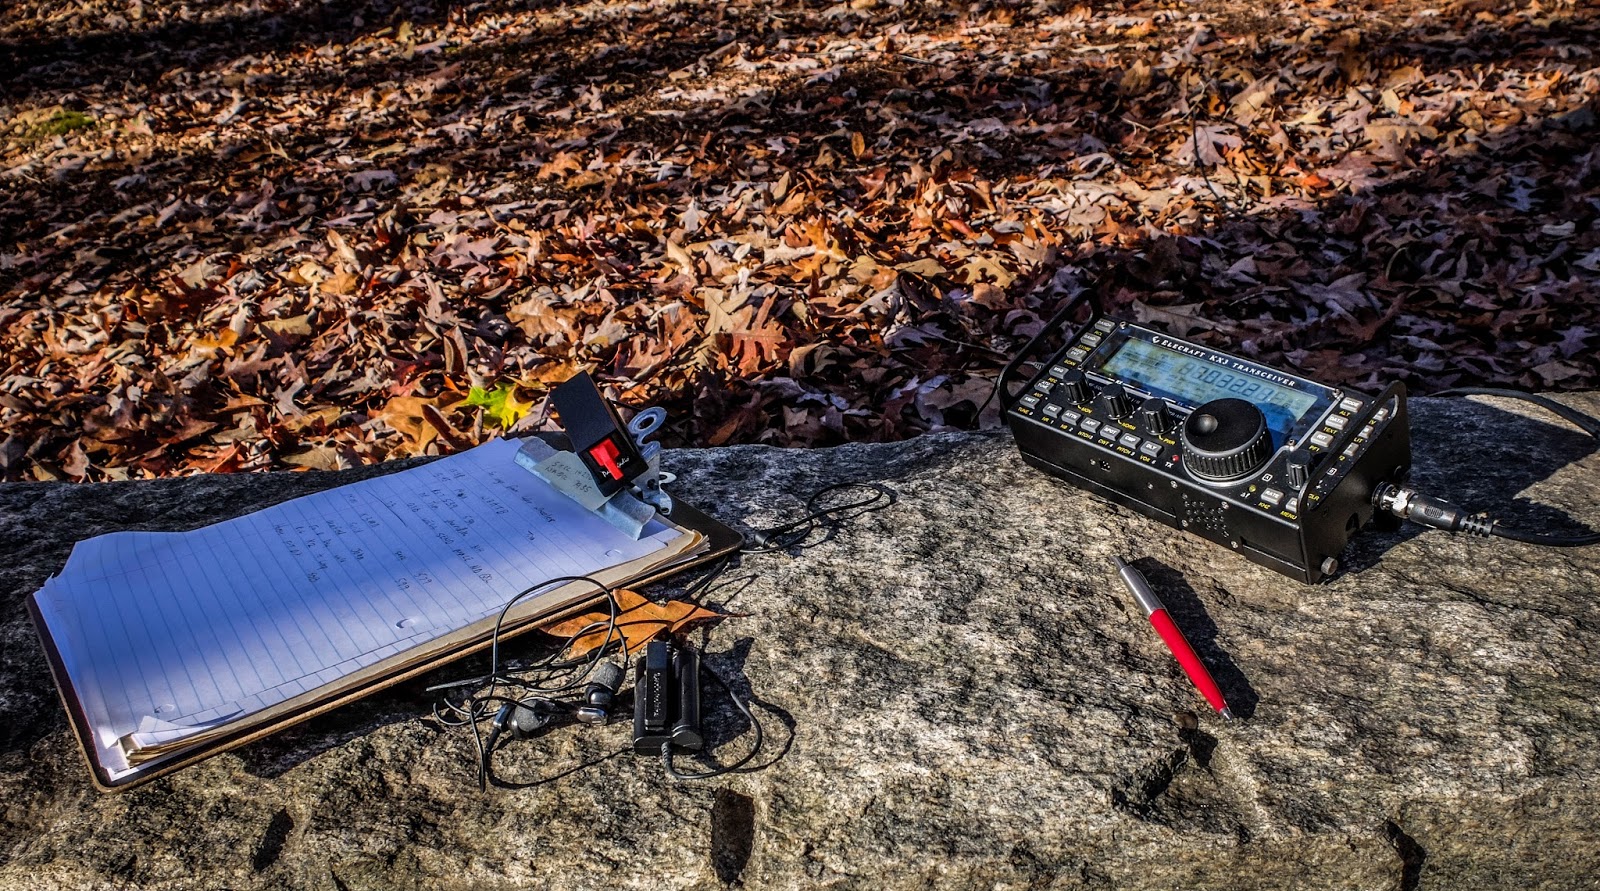
I had the day off today and it was a beautiful morning. I decided to spend part of it at Lake Wheeler Park in Raleigh, NC operating QRP from a stone bench under a tall oak tree.
rock 'n radio
I was operating the Elecraft KX3 from its internal AA batteries for the two hours I was there running 5 watts and it worked well. I had brought an external battery but didn't need to connect it.
I threw a line over a tree using a throwing weight. I hit my mark the first time, untied the weight, tied on the end of the antenna, and hoisted the 31 foot end-fed up exactly where I wanted it with the feed point a couple of feet off the ground.
31 feet of wire end-fed by a 9:1 balun.
A kite string winder holds the throwing line
A metal stake with a bit of rope anchors the balun and the other end of the rope
Another view of the end-fed with 9:1 balun, stake and coax
The 20 feet of coax serves as the counterpoise so hookups couldn't be simpler. The KX3 simply has the coax attached to one side and the morse key and headphones in the other.
QRP operating position
The morning was very pleasant, if a bit windy, clear with a temperature of 55 F.
The KX3 will match the end-fed wire on about any band other than 160m but on 80m you could likely throw the radio farther than the signal travels. The KX3 auto tuner is pretty amazing and I believe it could tune a piano if you hooked it up correctly.
I worked stations on 20m, 40m and 30m.
I called CQ on the 20m QRP calling frequency (14.060) and had a brief QSO with a lot of QSB (fading). I didn't hear much activity that early in the morning on 20m so I dropped down to 40m and worked the QRP calling frequency (7.030) and had my call answered right away. After that QSO another station jumped in there calling for a specific station so I moved on. 40m was busy. Every time I thought I'd found an open frequency someone would jump back in or if I called QRL? I'd get an R R.
So I went up to 30m, and had a very nice long ragchew that lasted nearly an hour. The internal AA batteries on the KX3 were getting a workout operating at 5w for that entire time but I never saw the transmit wattage drop below 5w and when I finished up the internal batteries still showed 9.8 V The cutoff is 8.5 V so there was plenty of juice left. I may just stop carrying the external battery on these brief jaunts.
My long ragchew was with a station in GA about 400 miles away and he gave me a report of 599 so I was thrilled with 30m this morning. Coincidentally, this end-fed antenna, balun, coax-counterpoise combo is nearly resonant on 30m and I've had some of my best reports when operating this portable antenna on 30m.
Key wise, I was using the Palm Single Paddle. It is a great little key when you don't have a table to operate from and you don't want to strap something to your leg. I get strange enough looks from passer-by's without them wondering why I have some mechanism strapped to my thigh and the Palm Single is very inconspicuous.
The Palm key has a clip-on, magnetic base which I use to temporarily attach it to my clipboard when I'm not sending. When I'm ready to send I simply pull it off the clipboard and hold it in my left hand. As I noted in an earlier review of the Palm Single Paddle it can be used as a straight key if you turn it on its side. The long ragchew I had on 30m was with a gentlemen who sent me his SKCC number in the first exchange so I quickly turned off the electronic keyer in the KX3's and turned the Palm Single on its side. That station sent me a nice compliment on my straight key FIST; so the little Palm Single key can serve duty as a paddle into a keyer or (in a pinch) as a straight key. I far prefer to use my Kent Hand Key if I'm operating manual key but it's too big to bring along for portable operations and I can't quite picture myself trying to hold onto the giant Kent Hand Key with one hand whilst operating it with the other like I can the Palm Single.
The Palm Single Paddle works great in portable operating positions
I made a silly little video of my trip to the park...
So enjoy some nice fall weather if you still have it and have a Rock 'N Radio adventure.
What could be finer than to be in Carolina in the Mooo-oor-ning
Enjoying the last nice days of our Fall... birds singing and morse code beeping
Ok, so I have my nifty 1977 Ten-Tec Century/21 and it has one CW key input and of course at its age it has no built-in electronic keyer, so no paddle for you buddy. I like to switch back and forth between a paddle and a straight key during a QSO so I went looking for an electronic keyer that would allow me to have both types of keys attached at the same time without touching any switches or controls. Some people simply plug both keys into a Y-Cable and then switch the keyer on in the radio when they want to use the paddle but I switch frequently enough to where I don't want to have to change any settings and I especially don't want to go into a menu (I'm a confessed menu hater).
A modern marvel... The HK5A HAM KEYER
Aren't those gold tone knobs lovely... this must have been the Deluxe Model
This electronic keyer dates somewhere between 1975 and 1985. The St. Louis Ham Radio Center primarily made and sold keys, both paddles and straight keys that were knock offs of the old Brown Bros. keys. One of their models was a "dual-key" with both a paddle and a straight key on one base so I assume that with this in mind they created the HK5A with dual-inputs allowing both a straight key and a paddle to be attached simultaneously. The HAM KEYER uses the clever Curtis 8044 keyer chip which is long out of production.
This keyer has no provision for memories but I don't expect to do contests with the old Ten-Tec and my memory is still fine so no worries... mmm, now what was I saying?
The HK5A has a sidetone speaker with a volume and pitch (tone) knob. It's not terribly unpleasant sounding, certainly no worse than the square-wave sidetone of the Century/21. Maybe I'll set it five semitones lower than my Century/21 for some sidetone harmony. The keyer weight knob has an enormous range and can turn your DITS into longer DASHES than the DASHES themselves so just a dab will do ya on that one, some component is probably out of spec inside the old boy. The far right knob turns it on/off and lets you turn side tone on (with Tone) and the last position is key-down for tuning without touching the key.
So it's a fairly normal keyer with the added bonus that it has outputs for both direct keying and grid keying for older rigs with high plate current, that is assuming you don't want deadly voltage on your key.
The business end
On the back of the keyer you can see the outputs for grid and direct keying as well as the inputs for the straight key, paddles and a funky 2.5mm T/R 6v power supply plug.
Paddle and Straight inputs, outputs for both Direct and Grid rig keying
It can also be powered by 4 internal C-Cell batteries which I've read last for ages so I went with that option rather than deal with RFI in one of my 6v wall-warts. If it turns out to be power hungry I'll put a different plug on one of my old 6v wall-warts and try to choke it sufficiently to keep it RF free. Best of all these old keyers come up frequently on auction sites and usually sell for very little. I got mine for $16 + postage.
So the HK5A HAM KEYER is the ticket to key coexistence.
Schematic
Demo
Other options?
There is another option for wiring manual keys together with an external keyer that only has a single key input. You can wire in the manual key(s) in parallel with the output of the keyer. So you could use a Y-Cable at the output of the keyer and then the transceiver would be triggered by the keyer when a paddle is used and also be triggered when a manual key when it is used. The only real disadvantage is that you cannot use the keyer for sidetone of any keys that are wired in parallel with its output.
If you are using a rig with an internal keyer and only one key input there really isn't an option for two keys at once without changing a setting in the rig, that was the genesis of this article and the sister article for the KX3 two-keys-at-once.
That's all for now
So lower your power and raise your expectations
Or the way my posts have gone lately I should say "So purchase your grandfather's era equipment and lower your expectations, hi hi"
The Windom (or OCF Dipole if you prefer), offers a true multi-band, experience without much use of a tuner.
The tuner in the images below is in BYPASS mode. I'm using it to demonstrate the resonance of the Windom on different bands. If you're not familiar with reading a cross-needle meter, the needle pointing to the left is the forward power (transmitted) and the needle pointing to the right is reflected power. You read the intersection of the two needles to determine the SWR. The red, curvy lines in the middle are the SWR based on the intersection of the two needles. It sounds complicated but it's so easy to view at a glance it's much nicer in my opinion than a digital SWR display.
The meter below is set to the 30w range rather than 300w so you are seeing 5w there rather than 50w
This antenna is resonant with a SWR of 1.1 or below on 80m, 40m, 20m and 10m.
80m SWR 1.1
SWR 1.1 on 80m at 3.530 MHz
40m SWR 1.0
SWR on 40m at 7.030 MHz (forgive me I was transmitting 10w on the Ten-Tec)
20m SWR 1.1
SWR under 1.1 on 20m at 14.060 MHz
SWR on 10m 1.0
SWR 1.0 on 10m at 28.030 MHz
15m is the worst with a SWR of 2.5 so it requires tuning
SWR on 15m 2.5 at 21.030 MHz
Who Cares?
So in the days of auto-tuners maybe this isn't that big a deal except that SWR does eat some power in the coax and if your running low power then your 5w may become 2w without you realizing it.
For older rigs that don't have an auto-tuner like my Ten-Tec Century/21 I don't have to worry about tuning at all except on 15m. It's also nice to just have the simplicity of transmitting into a wire without a inductance / capacitance circuit in-between.
Band change without re-tuning (except 15m)
So show me the antenna...
Images of wire antennas are not terribly interesting but here you go:
The apex of the antenna is hung from the peak of my roof. The coax attaches to a 4:1 current balun with the positive side of the balun feeding the longer wire. The shorter wire is 44 feet long and is supported at the apex height of 25 feet by a birch tree in the front yard. The long end of the antenna is 89 feet long and runs into the back yard. It is supported 12 feet off the ground by a fiberglass pole until I get a piece of wood permanently in place.
To tension the wire I have a support rope in the front tree attached to a 5lb weight. This will eventually wear through the rope and when it does I'll probably do it right and get a pulley up there. The support rope for the long end of the wire at the fiberglass pole goes through a pulley to a spring for tension.
80m Windom (OCF Dipole) hung from the peak of the roof
The line heading to the window is just rope that goes into the window so that I can pull it back to work on it, detach it, etc.
Long end of the wire (89 feet) is supported by a fiberglass pole about 12 feet agl
Back story
My 40m Windom had lain under the bushes for a number of years before being resurrected this past summer. It was bare wire and the balun was likely wet, corroded and filled with critters. Nonetheless I made hundreds of contacts using it QRP so I'm not knocking it too badly. The issue I had was that it had gone out of resonance for a good match on the bands it was supposed to support and I had to use the ATU in KX3 to touch it up. On some bands the SWR was as much as 5:1 so I was losing some power in the 100ft run of coax to my meager QRP radio.
When I recently picked up an old Ten-Tec Century/21 it had no auto-tuner and I'm not a big fan of manually tuning my MFJ Deluxe Versa Tuner II no matter how Deluxe it is. It's just time consuming and if I answer a QSO after tuning around and see that I need to re-tune, well that's just a bummer with a manual tuner. I'm trying to keep my costs down and using an auto-tuner with the old Ten-Tec just didn't seem right anyway so I wanted a resonant multi-band antenna.
I had an extra 4:1 current balun from years past and a fellow ham had recently given me a good supply of insulated wire. I also wanted to get an 80m so that all played together to putting up an 80m Windom in place of the 40m Windom. Only this time using some fresh parts. That was a little over a week ago and I've had some time to play with this new antenna.
I've received good reports and finally am able to operate on 80m without the tricky tuning of my 40m Doublet in the Attic.
So that's all for now
Update (11-20-2015)
I originally only tested the antenna with my Ten-Tec C21 which had no WARC bands. I was running the KX3 at the house yesterday and found that it also presents an SWR below 1.2:1 on 17m, 12m and 6m. That makes it resonant without tuning and with a super low SWR on 7 bands (80, 40, 20, 17, 12, 10, 6). That is truly an amazing antenna for those who don't like to use a tuner. It requires tuning on 30m and 15m as it is natively 4.5:1 on 30m and 2.5:1 on 15m which is well within the capability of any built-in auto-tuner and easily matched by a manual tuner.
Update (2-11-2016)
I have been puzzling over the good performance from this antenna and updated information in this post:Feeling Skippy on 80m
Lower you power and raise your expectations 72
Richard
N4PBQ
A second HF rig has somehow found its way into my home.
Ten-Tec Century / 21 CW Only Transceiver
Since getting back into HAM radio with my focus now on CW and QRP I find that many of my contacts use old and/or homebrew equipment. Maybe it's because I often call CQ with my straight key rather than paddles that results in most answers to my CQ being operators using a straight key or a bug. It seems these operators tend to not use the latest piece of shiny gear, which made me an anomaly; sending with a straight key while using my SDR-in-a-box like the Elecraft KX3. Maybe for this reason I've found myself being drawn to less sophisticated types of equipment. I'm not talking about wanting to go back to spark gap and gravity batteries, but sometimes the KX3 is just too easy to use.
In the same way that I'd prefer to send CW using a Straight Key to a keyboard since it's a greater challenge, I think that the older, less sophisticated equipment can bring more satisfaction to the hobby.
Vintage... like bell bottom jeans and corduroys
Now don't get me wrong, I'm not suggesting that the only "real" radios are those with discreet components or tubes, nor am I saying no key but a straight key. I'm just moving through some stages of the hobby that I missed because I didn't grow up with this older equipment and I think the challenges can be fun to learn and operate.
I didn't get into Ham radio until 2006 and the commonly available used equipment of the time was microprocessor controlled rigs with digital displays, optical encoders, DSP filters and seemingly endless menus for configuration. I went through a few HF radios over a couple of years: a Yaesu FT-857, ICOM 730 and lastly, a ICOM 746 Pro, before I sold the radios and dropped out of the hobby. At the time none of those rigs held any "magic" for me, they were just tools with increasing levels of functionality and ease of use. However the ICOM 730 did hold copious amounts of stale cigarette smoke and nicotine from the previous operator that it would release into my room as it warmed up. Not really magic, more of a non-corporeal element let's say.
If you've read my earlier posts you may recall that although I like my Elecraft KX3 immensely I have some strange fondness for TEN-TEC equipment. Ten-Tec has made some quirky radios with legendary full break-in QSK and supposedly smooth, quiet receivers for CW operators for a few decades now. So when a Craigslist posting leaped into my browser window (I don't know how that happened) advertising a seemingly pristine late-70s rig that had supposedly been reworked to a perfection, all for $140, I just couldn't pass it up... well at least the price in the ad was accurate.
The Ten-Tec Century 21 is an interesting transceiver. In the simplest sense it was an ideal radio for the Novice Licensed HAM operator of the 1970s. It is a CW only transmitter. It doesn't require fiddling with a resonant tank circuit of the typical tube radios of the era to work out resonance. It has a built-in power supply that runs off 115-120v mains. It doesn't use a superheterodyne receiver but a direct conversion receiver (Ten-Tec called it a double direct conversion receiver). This resulted in a simplified design and good selectivity but without the IF there is no AGC so be ready to work those RF/AF gain knobs. It also has easy band changing and nice filtering. From web searches and reviews its most common problem is a PTO that has to be rebuilt every few years. The Ham I purchased mine from said it had been rebuilt. It doesn't slip (yet) but it's kinda stiff so I expect a PTO rebuild to be in my future. I spoke with a ham I work with who has rebuilt one and he said it's not difficult, simply time consuming (but he repairs electronics all day so YMMV).
Operation is relatively simple:
Start with the radio off.
Turn the Drive knob down (counter clockwise), select your band
Turn the radio on by pushing in the RF Gain knob (it is the on-off switch).
Find and open frequency (wait, listen, wait again, listen) and while holding the Set Drive button apply just enough power using the Drive knob to give you some RF out for matching your antenna. Better yet use a frequency analyzer to tune QRM free.
After you're matched up you can bring the power up to where you want to operate. Unfortunately this can't necessarily be done into a dummy load unless you're match is near 1:1. The SWR will affect how much output drive you can use. If you're going to run QRP then no worries because you won't be running the power input up to a point that could trip the final, Maximum input power is marked by the thick line on the Input Power meter (about 70w). This results in differing output wattage dependent on antenna resistance and frequency. I found that into a 50ohm dummy load I could generate up to 40w output for 80m, 35w output for 40m, 30w output for 20m and so on, down to about 15w output on 10m. As I plan to use the rig for QRP this is mostly academic. It certainly can provide more than QRP output levels if conditions warrant.
To Tune a Station prior to the QSO
This seems more complicated than it should be but I'm guessing after I've done it a few dozen times it will become automatic.
The Offset Knob
The CW tone you hear is the difference between the current PTO tuning and the position of the Offset knob. The Offset knob can be an offset to either side of the current frequency (think of this as CWR depending on your band). In other words the zero position of the Offset knob applies zero audio offset to the currently tuned frequency so you wouldn't hear a tone from a signal with zero offset. You should have the Offset knob slightly to the left on 80m and 40m (LSB offset) and slightly to the right of zero for the USB bands.
The Zero Beat Knob
So with the information above in mind... Pressing the Zero Beat button defeats whatever the Offset knob is set to (effectively zeroing the offset). When you are exactly on frequency with a signal the audio from the signal nulls (goes silent). This null / silence is your indication that your transmitter frequency matches the other station.
However I've found that the Null or Zero Beat is quite broad, such that you could be up to 250Hz off frequency based on where you leave the PTO in the Null.
For my radio, on LSB bands, I press the Zero Beat button, find the null and then go past it (turning the knob to the left) and then just tweak it back into the null. At least for my radio that works. Maybe other Century 21s have a finer Q on the Null.
After you have zero beat the signal you can use the Offset knob like a RIT. The range on that knob is really broad. I think the manual said 5kHz so just a touch goes a long way unless you like to listen to CW with a ear piercing 2kHz, high pitched tone.
Here's a video demonstrating operating the rig...
TEN-TEC Century 21 -- Front Panel Controls
QSK
The Century 21 has full break-in QSK on at all times. It is extremely clean with no discernable pops or artifacts. One complaint I have is that the pitch and tone of the sidetone itself is fixed. You can vary the volume through a little hole in the bottom cover to turn a thumb wheel, from very loud to just loud but you cannot change the pitch and it's a bit harsh sounding.
The headphone jack on my particular radio is broken. I need to open it up to resolve that before the wife uses a large heavy object on my beautiful new transceiver.
Selectivity
This video demonstrates the receiver selectivity of this old radio.
Where is the S-Meter?
This is a bare bones transceiver with just the basics necessary for CW communication. As far as information for the operator: Well there's an analog dial that gives you a rough indication (within 5kHz) of where you are transmitting, and an input wattage gauge for the drive and that's all. Notably missing is a Signal Strength meter so the signal reports you send will be based on your ear, or how generous you're feeling at the time.
It's a little funny to me that I'm enjoying using this radio given it's lack of... well just about everything compared to my Elecraft KX3 whose tiny display indicates Signal Strength, Signal Relative to Zero Beat, SWR, RIT Offset, VFO A/B (down to a 10Hz range) Time, PA Temp, etc. It just goes to show you how much modern rigs have that, when it comes down to it, isn't actually necessary for communication.
Specifications
A bit of history about TenTec QRP radios and the C21 from a 1977 magazing article...
Frequency Coverage: 3.5 to 4.0; 7.0 to 7.5; 14.0 to 14.5; 21.0 to 21.5; 28.0 to 28.5; 28.5 to 29.0 MHz. (Crystal not supplied for 28.5 to 29.0 MHz, but available as accessory, Model 273.) Note - Early models only included crystals for 3.5, 7, and 14 MHz bands. Crystals for 21 Mhz and 28 Mhz bands were available as optional Models numbers 271 and 272.
VFO Frequency Stability: less than 20 Hz change per degree Fahrenheit, averaged over a 40o change from 70o to 110o, after 30 minute warmup. Less than 20 Hz change from 105 to 125 VAC line voltage.
Direct Frequency Readout: Marked in 5 kHz increments from 0 - 500 kHz, MHz markings for each band displayed.
Tuning Rate: Approximately 17 kHz per revolution of main tuning knob.
Power Requirements: 105 - 125 VAC, 50-60 Hz. 10 watts receive, 100 watts transmit.