Showing posts sorted by relevance for query kx3. Sort by date Show all posts

Sunday, February 28, 2016

The Grand Illusion

Five by Nine... QRP... How can it be?

What does an S-Unit really mean and how can a QRP station sound like a 500w station?

The real gain doesn't come from transmitter watts
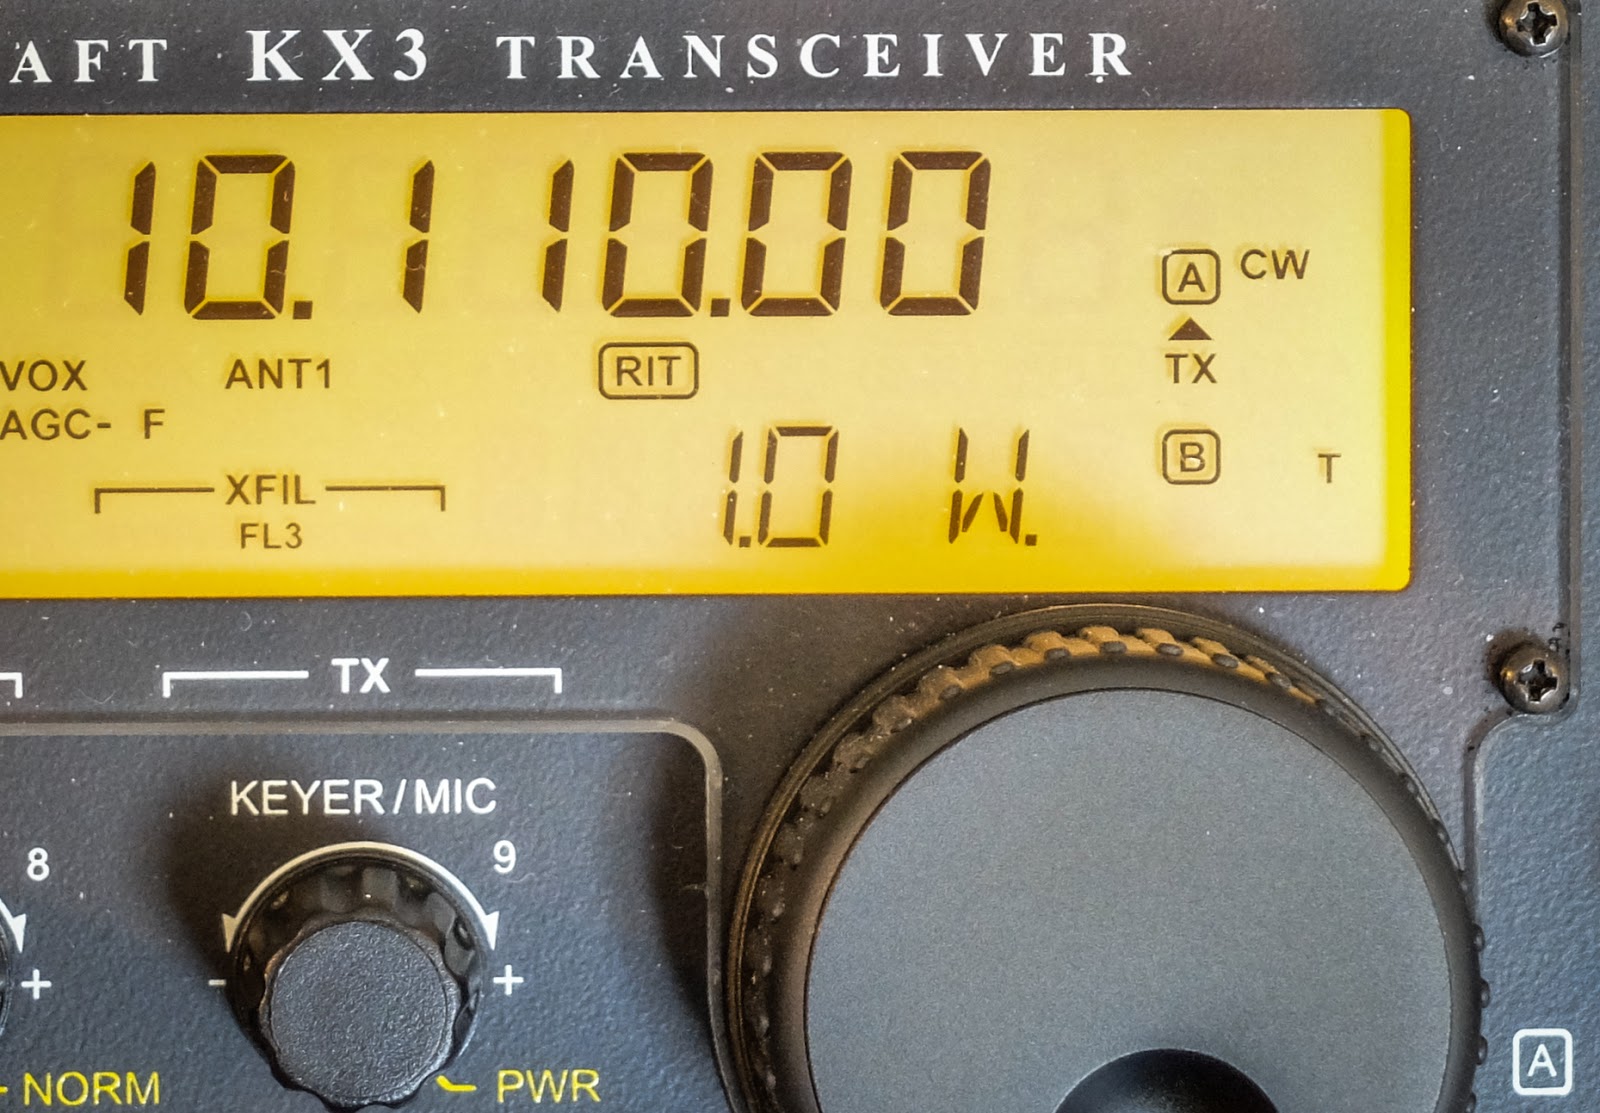
I rarely go up to the phone portion of the bands.  Since I started doing QRP and CW last summer I think I've only made two SSB contacts just because my focus has been CW.  But last night I was working on a bench project and tuned the Elecraft KX3 up to the phone portion of 40m for some entertainment.

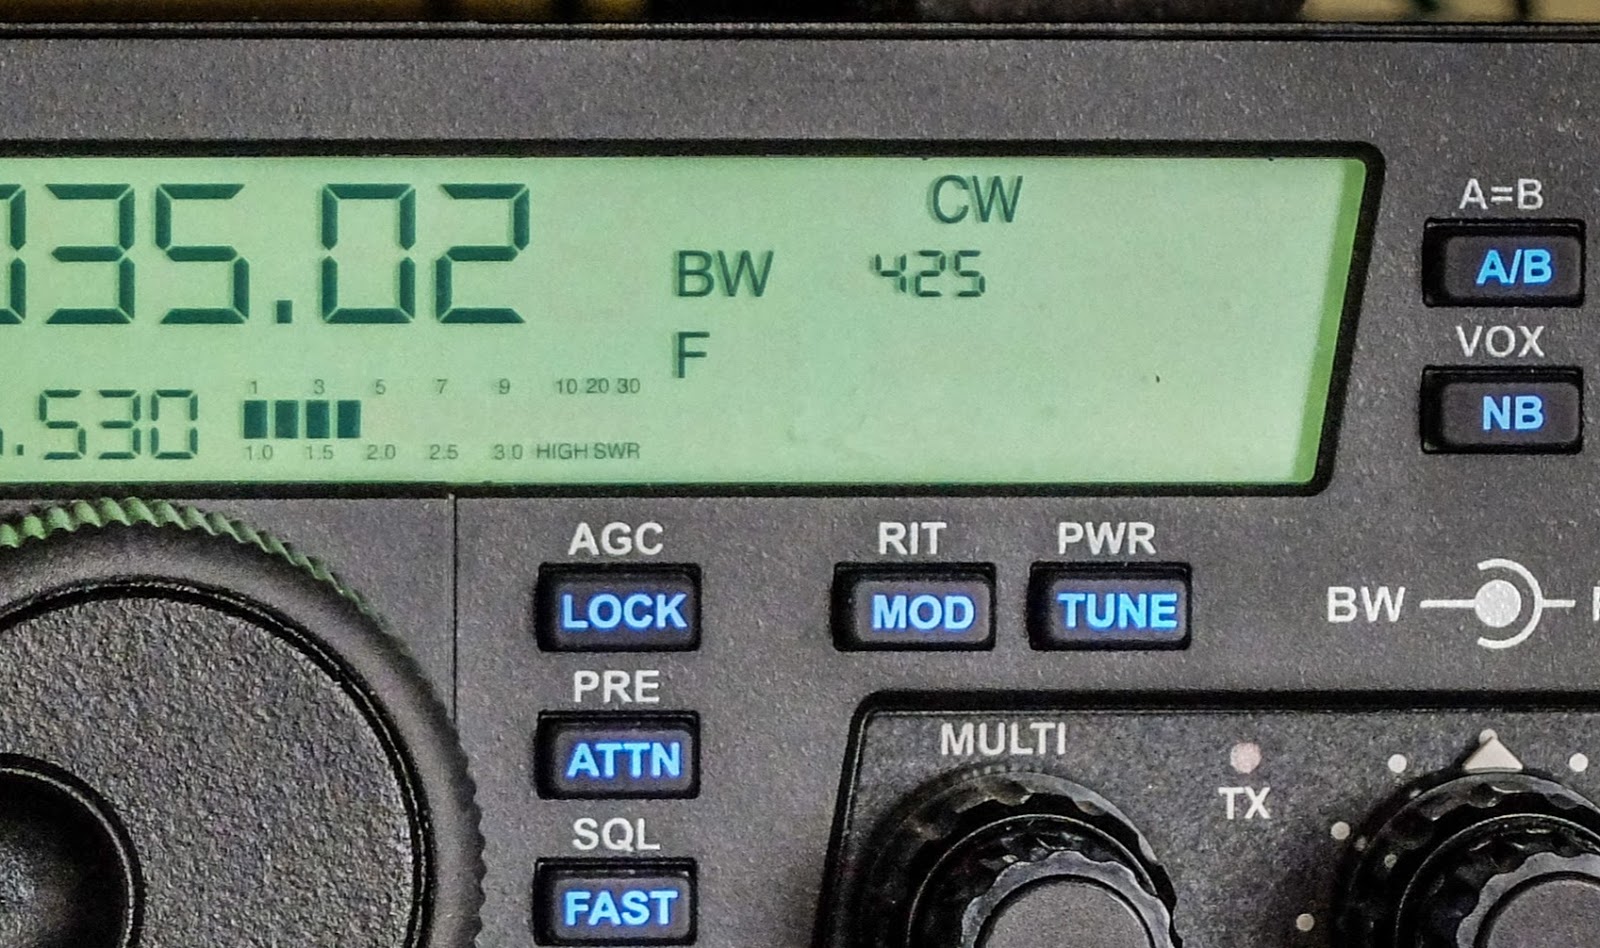
A station in Rhode Island was testing his amp with a new antenna and was getting reports from various stateside operators.  There was a lull where no one was answering his CQ so I thought I'd give him a call.  He was peaking at S9 on my KX3's meter and he also sent me a signal report of S9 with some 10 over peaks.  I then told him I was a QRP station running 10 watts and heard the usual surprised reaction from a QRO station.

I gave him reports as he switched back and forth from running barefoot ~75w to his amp ~500w.  With his amp on he was an S9, running barefoot he was S8.  So the amp gave him one additional S unit.  In terms of hearing him I would have been hard pressed to tell much difference simply by volume.  He was perfectly copyable without noise with the amp off.

We also did some tests with my station at reduced power (as if...)  At 10w-12w output I received a S9 to S9+10.  Reducing output to 5 watts netted me a S8 report and when I reduced to 1 watt (one watt) he was still able to comfortably copy me and I received an S5.  So with my station at 1 watt and his running 500 watts we could still converse via SSB.  Ladies and Gentlemen you don't need as much output wattage as you think you do.

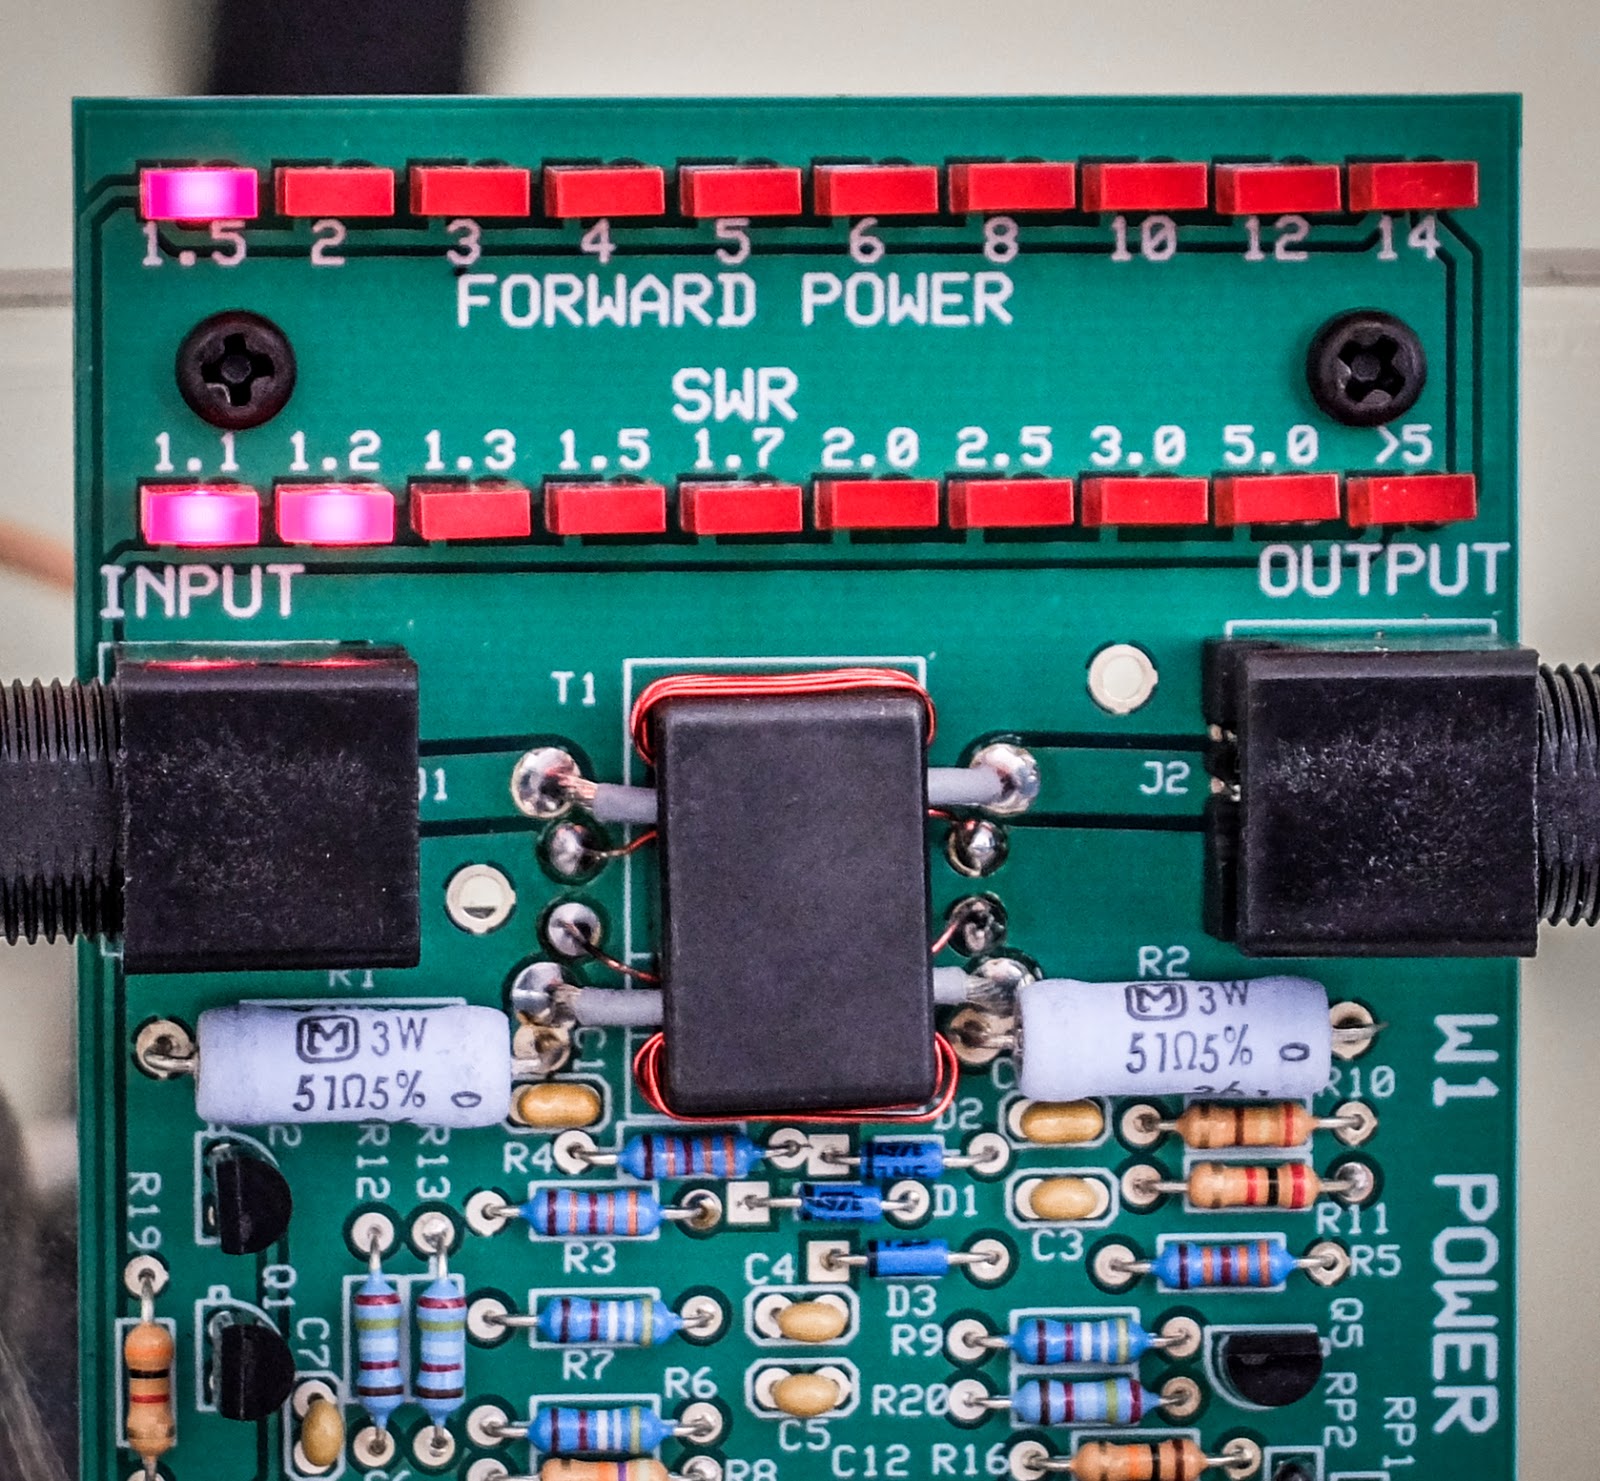
He was running through a newly constructed homebrewed vertical while I was using my 80m OCF Dipole.  We didn't discuss what sort of radial system he had installed, but the difference in antennas was likely the deciding difference in our stations.  We were about 500 miles apart and his vertical probably had more low-takeoff gain than my dipole, or possibly more ground loss so I probably had better high angle gain on him for the short 500 mile skip.  I think the take-away from this exercise is that the antenna is generally the key rather than transmitter power.  If I can get 6 dB of gain from my antenna I have in essence quadrupled my effective radiated power.  Quadrupled?  Yes, Quadrupled effective output power.

Power and S-Units

You've probably heard it before but it's worth a refresher...  Our radio's meter display a measurement in "S-Unit".  To move the meter up one S-Unit the receiver must hear 6 more dB (decibels).  So one S-Unit is 6 dB.

A decibel is:
  • A Power Ratio:  dB = 10 Log P2/P1
  • A Voltage Ratio:  dB = 20 Log V2/V1 

You increase 3dB each time you DOUBLE your power

That's worth repeating... 
You increase 3dB each time you DOUBLE your power.  So to gain one S-Unit you must quadruple your power.
So if you are running 100 watts, to gain one S-Unit using the same antenna system you must increase your power to 400 watts.  If you are running QRP SSB (10 watts) that is only 1.5 S-Units down from 100 watts.  100w / 2 (-3dB)  = 50w / 2 (another -3dB or 1 S-Unit) = 25w... etc.

Antennas offer the cheapest increase in dB

Note the statement above "using the same antenna system".  That's the key then isn't it?  It's easier to get 6 dB of gain from an antenna than from wattage.  A 40m doublet can offer significant directional gain especially when operated on higher bands.  Now unless it's rotatable you will be at the mercy of the directionality of its lobes but if you have trees or tall structures you can very cheaply string up a few dipoles oriented in different directions and for far less money that a 500 watt amp (6 dB).  If you can only have one wire antenna you may miss out on some DX in the antenna's nulls but you will have some stellar gain in the direction of the lobes.  Of course rotatable yagis and beams are the best but now we are talking about real money again.  I'm talking bang for the penny.  You don't have to buy a wire antenna.  Some Dacron rope or weed-eater line and some surplus insulated wire is all you need.  You can even make your own feedline cheaply from electric fence wire and insulators.

We have a great hobby, but there are so many aspects of it that sound like common sense when they really are not... like increase your power.

Increasing power gains you very little compared to a better antenna systems.

That's all for now.

So lower your power and raise your expectations (or your antennas)

72/73 (Note:  72 is a common substitute for 73 among QRPers... as in "not enough power for 73") 
Richard, N4PBQ

Wednesday, August 19, 2015

Copying weak CW signals -- The counter-intuitive solution

How do you copy? (HW?)

AF/RF Gain control
When working QRP stations the signal often fails to register on my S-meter.  My display would often look like the one on the right...  Nothing registering on the S-Meter, even with the preamp enabled, yet the station is there... down in the noise sending my call. 

So as I've been spending more time learning to operate CW QRP I keep getting worked by stations that are able to copy me when I cannot copy them.  More often than not QSB would take their side of the QSO into the noise for a time and I wouldn't be able to copy them.  When the inevitable "HW?" (for how do you copy) would come back I'd often have to say "PSE AGN?" (please send again).  

This occurrence happened frequently enough to where I thought I should ask Paul (AA4XX) what was going on. His response seemed counter-intuitive but as I've come to see it's just the ticket.

Turn DOWN RF Gain and turn UP AF Gain

The radio's RF gain is normally left at 0dB.  It can't be turned "up" past 0dB although most radios have a "preamp" that takes the input from the RF and amplifies whatever is there.  Whereas AF gain controls the audio volume.  When you turn the RF gain down (negative values, i.e. -12dB) the signal is being reduced before it is passed to the AF (audio gain) stage.  As counter-intuitive as it seems, by turning down the RF gain and increasing the AF gain (turning down the input and turning up the output) you can sometimes discern a signal that was previously in the noise.

The human ear is a great discriminator and if the receive signal level is reduced such that the background noise is lessened then the audio level (AF) can be increased to the point where you can hear the signal better.  From what I understand it's a matter of separating the signal from the noise.

KX3 Signal path
I started using this technique this past weekend and it's made a big difference in my ability to copy weak stations.  It has also lessened my listening fatigue because I'm not simply turning up noise, trying to hear the station, I'm separating the signal from the noise.  
Technically I have no idea why this works.  
It would seem that lowering the receiver gain simply to increase the audio gain would just swap one noise for another but it does work with my radio.  It requires me to ride the knobs to keep the station in a comfortable listening range and since my KX3 only has one knob for both AF and RF gain (switched by a quick push) it can be a little tedious.  So I began to make use of the volume control on my earbuds.  

Here's my procedure for copying weak stations:
  1. Turn the volume down on my earbuds/headset (independent from the radio volume knob)
  2. Turn the AF on the radio to maximum.  My headset / earbuds volume control is now acting as my audio volume.
  3. Click AF/RF knob to select RF.  
  4. Turn the RF down until I hear no "noise" and just hear the signal
I have to ride the RF knob during the QSO to control my signal and my independent headphone volume control keeps me from having to keep clicking the knob back and forth on the radio to switch from AF to RF control.
The bands have been relatively quiet for the past few weeks since getting back in the hobby and now that we are on the downward curve of the Solar cycle it's bound to get even worse for the next few years so I may as well learn to copy weak signals, be they QRP or QRO.
I was able to work a few difficult to copy stations (for me) this weekend including N8XMS President of the NAQCC club.  Without the weak signal trick AA4XX suggested to me I don't think I would have been able to work those stations with my present antenna at my QTH.

I hope this helps new CW operators or those struggling to copy weak signals.

Friday, May 27, 2016

Let your fingers do the talking...

Let them play different instruments

Keys left to right
Nye Viking, Kent Hand key, Vibroplex Original Bug, N3ZN ZN-QRP paddle, Palm Single paddle
My collection of keys has grown over the past few months and I find that I like each for their particular qualities.

Keys from left to right

The Nye Viking is somewhere between a traditional J-38 low style American key and a tall European style.  At first I couldn't get any sort of coordination with it even after a couple hours of practice and it stayed in the closet for a few months.  Eventually I wanted to leave a key hooked up to the old Century/21 so I didn't have to move the output of my external keyer so the Viking came back out.  I've finally become accustomed to it and am even beginning to enjoy it as much as the Kent.  I'm amazed at how different two straight keys can be.

The Kent Hand key continues to be my favorite key for straight key operation.  The Kent is operated using your entire arm off the desk and when I send using it above 15wpm I get the entire desk shaking with the motion.  My desk light starts casting dancing shadows across the equipment from the vibration and with the clacking of the key and the blare of the sidetone the world of CW becomes visceral.

The Vibroplex Bug remains at the center of the collection because I have some strange affinity for the quirky bug.  I use it on every QSO where I hear another bug operator or with SKCC operators that are sending faster than 17wpm.  It has a non-cosmetic, yet effective, weight added from an old steel spacer to slow it down to a range of 21wpm to 16wpm and some dental floss around the DIT contact spring to reduce the potential bounce which results in scratchy sounding DITS.

The N3ZN ZN-QRP paddle is a work of art and when I'm working higher speed CW it's my go-to key.  The carbon fiber finger pieces and lightweight clickety action always puts a smile on my face.  I keep it connected to the external Ham Keyer which has a handy knob to for quickly adjusting keyer speed.

The Palm Single to the right is magnetically mounted to a steel base a friend made for me. I pull it off the base when I go portable as it's my go-to key for all my portable operations.  But when I'm at the home station I leave it hooked up to the keyer input on the Ten-Tec Eagle because the Eagle's keyer is only Iambic-B mode and I just can't get used to "B-Mode".  Using a single, non-iambic paddle eliminates the weird timing of the B iambic mode.  I really should learn mode-B since it seems to be standard on Ten-Tec and Kenwood radios. 


The 3 stars in the center are the Kent Hand key, Vibroplex Original Bug and the N3ZN paddle

The 3 keys in the middle (Kent Hand key, Vibroplex Bug and N3ZN paddle) remain hooked up to the Ham Keyer and I move the output of that keyer to whichever rig I'm primarily using at the time.  That keyer uses Iambic-Mode-A which I'm comfortable with and it debounces the scratchiness of the Bug.  I hook the output of the keyer up to either the PTT line on the Eagle or the secondary key input on the KX3.  When using the C21 I just use the Nye straight key.

Debouncing a Vibroplex Bug


Side story on the Bug... If you get a Vibroplex bug and hook it up to the PTT line of your radio you may find that you're missing DITS or that the output sounds broken or scratchy.  The PTT line of many radios is not "buffered" meaning it is reacting to every contact closure.  On a bug, the DIT contact is actually bouncing potentially hundreds of times a second since the contact force is so light and doesn't make a clean closure.  Many keyers will filter out those multiple contacts or bounces.  My old HAM KEYER weight control actually serves as a DIT weight control for the manual keys as well so it's ideal for use with the bug.

KE6EE offered me this nice explanation of what was going on:
The more usual term for the process of dealing with problems of contact closure is "debouncing." Google and you will find lots of interesting visuals and explanations.

The actual start and finish of contact closures and openings in switches, relays and keys, is not a simple off-and-on process but a series of "bounces." Dit contact closures on a bug are likely to be very bouncy. 

Bug dit contact design and bug maintenance and adjustment are critical for minimizing bounce. Ops with Vibroplex-style dit contacts often put a piece of rubber or plastic foam in the U-shaped dit contact spring. The Begali bug uses a unique pointed and spring-loaded dit contact. Many bug ops, from my observations on the air, do not adjust their dit weight properly to minimize a scratchy sound.

Transmitter keying circuits are usually "debounced" in various ways, the simplest perhaps being to put a capacitor across the key contact circuit. A PTT circuit doesn't need to be debounced so it isn't. Keyers often have debounce circuits designed to be used with straight keys and bugs.

Try different keys

So if you are getting into CW try some different keys.  I think you'll be surprised by the differences and find that your mood or situation will dictate the use of one key over another.   Morse keys on the used market aren't expensive if you shop carefully so you can build quite a collection.  They also tend to hold their value if you find that you've obtained a key or two that you just can't grok.


My ever changing station sporting a spiffy new chair

 That's all for now

So lower your power and raise your expectations

73
Richard, AA4OO

Friday, November 6, 2015

The Amazing 80m Multi-band Windom

Happier than a slinky on an escalator

OCF Dipole resonant on 7 bands

The Windom (or OCF Dipole if you prefer), offers a true multi-band, experience without much use of a tuner.  
The tuner in the images below is in BYPASS mode.  I'm using it to demonstrate the resonance of the Windom on different bands.  If you're not familiar with reading a cross-needle meter, the needle pointing to the left is the forward power (transmitted) and the needle pointing to the right is reflected power.  You read the intersection of the two needles to determine the SWR.  The red, curvy lines in the middle are the SWR based on the intersection of the two needles.  It sounds complicated but it's so easy to view at a glance it's much nicer in my opinion than a digital SWR display.
The meter below is set to the 30w range rather than  300w so you are seeing 5w there rather than 50w

This antenna is resonant with a SWR  of 1.1 or below on 80m, 40m, 20m and 10m.

80m SWR 1.1
SWR 1.1 on 80m at 3.530 MHz

40m SWR 1.0

SWR on 40m at 7.030 MHz (forgive me I was transmitting 10w on the Ten-Tec)

20m SWR 1.1

SWR under 1.1 on 20m at 14.060 MHz

SWR on 10m 1.0

SWR 1.0 on 10m at 28.030 MHz

15m is the worst with a SWR of 2.5 so it requires tuning

SWR on 15m 2.5 at 21.030 MHz

Who Cares?

So in the days of auto-tuners maybe this isn't that big a deal except that SWR does eat some power in the coax and if your running low power then your 5w may become 2w without you realizing it.

For older rigs that don't have an auto-tuner like my Ten-Tec Century/21 I don't have to worry about tuning at all except on 15m.  It's also nice to just have the simplicity of transmitting into a wire without a inductance / capacitance circuit in-between.

Band change without re-tuning (except 15m)

So show me the antenna...

Images of wire antennas are not terribly interesting but here you go:

The apex of the antenna is hung from the peak of my roof.  The coax attaches to a 4:1 current balun with the positive side of the balun feeding the longer wire. The shorter wire is 44 feet long and is supported at the apex height of 25 feet by a birch tree in the front yard.  The long end of the antenna is 89 feet long and runs into the back yard. It is supported 12 feet off the ground by a fiberglass pole until I get a piece of wood permanently in place. 

To tension the wire I have a support rope in the front tree attached to a 5lb weight.  This will eventually wear through the rope and when it does I'll probably do it right and get a pulley up there. The support rope for the long end of the wire at the fiberglass pole goes through a pulley to a spring for tension.
80m Windom (OCF Dipole) hung from the peak of the roof
The line heading to the window is just rope that goes into the window so that I can pull it back to work on it, detach it, etc.
Long end of the wire (89 feet) is supported by a fiberglass pole about 12 feet agl

Back story

My 40m Windom had lain under the bushes for a number of years before being resurrected this past summer.  It was bare wire and the balun was likely wet, corroded and filled with critters.  Nonetheless I made hundreds of contacts using it QRP so I'm not knocking it too badly.  The issue I had was that it had gone out of resonance for a good match on the bands it was supposed to support and I had to use the ATU in KX3 to touch it up.  On some bands the SWR was as much as 5:1 so I was losing some power in the 100ft run of coax to my meager QRP radio.

When I recently picked up an old Ten-Tec Century/21 it had no auto-tuner and I'm not a big fan of manually tuning my MFJ Deluxe Versa Tuner II no matter how Deluxe it is.  It's just time consuming and if I answer a QSO after tuning around and see that I need to re-tune, well that's just a bummer with a manual tuner.  I'm trying to keep my costs down and using an auto-tuner with the old Ten-Tec just didn't seem right anyway so I wanted a resonant multi-band antenna.

I had an extra 4:1 current balun from years past and a fellow ham had recently given me a good supply of insulated wire.  I also wanted to get an 80m so that all played together to putting up an 80m Windom in place of the 40m Windom.   Only this time using some fresh parts.  That was a little over a week ago and I've had some time to play with this new antenna.

I've received good reports and finally am able to operate on 80m without the tricky tuning of my 40m Doublet in the Attic.

So that's all for now

Update (11-20-2015)
I originally only tested the antenna with my Ten-Tec C21 which had no WARC bands.  I was running the KX3 at the house yesterday and found that it also presents an SWR below 1.2:1 on 17m, 12m and 6m.  That makes it resonant without tuning and with a super low SWR on 7 bands (80, 40, 20, 17, 12, 10, 6).  That is truly an amazing antenna for those who don't like to use a tuner.  It requires tuning on 30m and 15m as it is natively 4.5:1 on 30m and 2.5:1 on 15m which is well within the capability of any built-in auto-tuner and easily matched by a manual tuner.
Update (2-11-2016)
I have been puzzling over the good performance from this antenna and updated information in this post:Feeling Skippy on 80m

Lower you power and raise your expectations

72
Richard
N4PBQ

Friday, December 30, 2016

Peace on Earth... and in the Shack

Quieting a noisy power supply

With a bit of time over the Christmas break I'm finally getting around to work on things that have bugged me for a while... like my noisy power supply.


My TenTec Century 21 doesn't have a fan and it has a built-in power supply, so no fan noise.  My Elecraft KX3 has no fan, so no fan noise and it can run all day from a small 12v battery.  My TenTec Eagle only runs fans when the finals get hot and even then the fans are in the interior of the case and are speed controlled, low-speed, high-volume dudes that I have never heard. I can feel air moving through the Eagles vents so I know the fans work, their just silent.  But the Eagle needs an external power supply.

The calming sound of CW wafting forth from the Eagle is soon destroyed by a sound not unlike an air-raid siren emitted from my Astron power supply as it kicks its fan into high gear

Problem


My power supply has a single, large fan that makes me jump every time it whirs into action.  Admittedly, my power supply was near the bottom of the range in the Astron lineup.  I assume they have speed controlled fans, or at least quieter fans further up the product line.  I purchased this one used, about 9 years ago, so who knows, maybe their new power supply's have speed controlled fans.

Anyway, on my model, the muffin fan produces a hurricane force blow switched by a thermocouple located on the transistor heat sink (right hand side).  It is a very simple design... when the thermocouple trips it closes a circuit to the fan.  When heat sink temperature falls below the threshold it cuts off.  So the fan is either ON or OFF.  Normally the fan doesn't come on when the rig is idling, and it will only come on once in a while at QRP levels.  I just never know when, but I'm always anticipating... like the jerk kid that would flick your ear when he walked by back in school (hmm, I feel as though I may have some un-dealt with issues from childhood).

The fan seems to have a knack for coming on when I'm working a station that is fading into the noise and remaining on until I've missed some key piece of the QSO.

Solution


What I wanted to do was keep the air moving like a gentle breeze rather than a pulsing Category 5, but still allow the fan to come on full speed if needed.  So the trick was to get the fan to run continuously at a slow speed whenever the power supply was on but still allow the thermocouple to give it the gas.

The label on the fan says it's 1.4w 12v... I rummaged through my junk box looking for 2w and higher resistors.   I didn't find a lot to choose from, since I just haven't been at this electronics building stuff all that long.  I had a number of very low resistance ones from 2 ohm to 20 ohm and everything else was 650 ohm or higher.

I clipped test leads to both sides of the thermocouple on the heat sink that controls the fan.  I wanted to try different resistor values to see what happened.  Predictably, the low value resistors acted pretty much like a closed circuit and the fan ran near full speed.  I could have strung a number of the low value resistors in series but that seemed messy and the values were mostly very low.  I tried my next lowest value 2-watt resistor, 650 ohm.  The fan didn't even come on with 650 ohm resistance.  I didn't have anything in between so I put two of the 650's in parallel and it turned verrrry slooowwwly.

You can find TOTAL RESISTANCE in a Parallel circuit with the following formula: 1/Rt = 1/R1 + 1/R2 + 1/R3 + ... "

Ok I was on to something.   Turned out that 5 of the 650 ohm 2w resistors in parallel did the trick... That turned out to be near 130 ohm.  I left them hooked up for an hour or so to make sure more current wasn't being pulled than I expected, and they only became slightly warm to the touch so I figured my redneck engineering was good to go.  I soldered the bundle of resistors leads in parallel and used some heat shrink to keep it neat.

I've used the power supply for a good part of a day and it stays nice and quiet now.  Not silent, but good enough to where I can't hear it at all with my headphones on.  A key down test into a dummy load at QRO power repeated times confirmed that the fan will go to full speed after a while but in normal operation, the thermocouple never triggers.

By my low standards, I deem this a success.


redneck ham engineering

Perform this mod at your own risk

This is certainly not a manufacturer approved modification and your power supply may be quite different than mine so tinker at your own risk.  Oh, and be careful when you have the cover off a power supply there are multiple, high voltage components in there.  Make sure it's unplugged and has plenty of time to bleed off power from the big capacitors before you start messing with anything in there.


That's all for now

So lower your fan speed and raise your quality of life...

72/73
Richard AA4OO

Saturday, November 7, 2015

Can a Straight Key really Coexist with a Paddle ?

The Harmony of the Keys 

co·ex·ist
/kōəɡˈzist/ -- verb 
exist at the same time or in the same place.

Can a Straight Key coexist with a Paddle? 

Key  ☾☮ E ✡ ☼ † 
Ok, so I have my nifty 1977 Ten-Tec Century/21 and it has one CW key input and of course at its age it has no built-in electronic keyer, so no paddle for you buddy.  I like to switch back and forth between a paddle and a straight key during a QSO so I went looking for an electronic keyer that would allow me to have both types of keys attached at the same time without touching any switches or controls.  Some people simply plug both keys into a Y-Cable and then switch the keyer on in the radio when they want to use the paddle but I switch frequently enough to where I don't want to have to change any settings and I especially don't want to go into a menu (I'm a confessed menu hater).

A modern marvel... The HK5A HAM KEYER

Aren't those gold tone knobs lovely... this must have been the Deluxe Model
This electronic keyer dates somewhere between 1975 and 1985. The St. Louis Ham Radio Center primarily made and sold keys, both paddles and straight keys that were knock offs of the old Brown Bros. keys.  One of their models was a "dual-key" with both a paddle and a straight key on one base so I assume that with this in mind they created the HK5A with dual-inputs allowing both a straight key and a paddle to be attached simultaneously.  The HAM KEYER uses the clever Curtis 8044 keyer chip which is long out of production.

This keyer has no provision for memories but I don't expect to do contests with the old Ten-Tec and my memory is still fine so no worries... mmm,  now what was I saying?  

The HK5A has a sidetone speaker with a volume and pitch (tone) knob.  It's not terribly unpleasant sounding, certainly no worse than the square-wave sidetone of the Century/21.  Maybe I'll set it five semitones lower than my Century/21 for some sidetone harmony.  The keyer weight knob has an enormous range and can turn your DITS into longer DASHES than the DASHES themselves so just a dab will do ya on that one, some component is probably out of spec inside the old boy.  The far right knob turns it on/off and lets you turn side tone on (with Tone) and the last position is key-down for tuning without touching the key.

So it's a fairly normal keyer with the added bonus that it has outputs for both direct keying and grid keying for older rigs with high plate current, that is assuming you don't want deadly voltage on your key.

The business end

On the back of the keyer you can see the outputs for grid and direct keying as well as the inputs for the straight key, paddles and a funky 2.5mm T/R 6v power supply plug.  
Paddle and Straight inputs, outputs for both Direct and Grid rig keying

It can also be powered by 4 internal C-Cell batteries which I've read last for ages so I went with that option rather than deal with RFI in one of my 6v wall-warts.  If it turns out to be power hungry I'll put a different plug on one of my old 6v wall-warts and try to choke it sufficiently to keep it RF free.  Best of all these old keyers come up frequently on auction sites and usually sell for very little.  I got mine for $16 + postage. 

So the HK5A HAM KEYER is the ticket to key coexistence.

Schematic

schematic

Demo

Other options?

There is another option for wiring manual keys together with an external keyer that only has a single key input.  You can wire in the manual key(s) in parallel with the output of the keyer.  So you could use a Y-Cable at the output of the keyer and then the transceiver would be triggered by the keyer when a paddle is used and also be triggered when a manual key when it is used.  The only real disadvantage is that you cannot use the keyer for sidetone of any keys that are wired in parallel with its output.  

If you are using a rig with an internal keyer and only one key input there really isn't an option for two keys at once without changing a setting in the rig, that was the genesis of this article and the sister article for the KX3 two-keys-at-once.

That's all for now

So lower your power and raise your expectations
Or the way my posts have gone lately I should say "So purchase your grandfather's era equipment and lower your expectations, hi hi"

72/73
Richard
N4PBQ

Saturday, January 21, 2017

Quirky Keyer - The MFJ-493

The MFJ-493 has some cool tricks and some not so cool flaws

MFJ-493 "Super" Menu Driven Memory Keyer

Memory keyers do the repetitive and boring stuff

The bands have not been kind in this declining sunspot cycle and I've been sending out my call repeatedly on occasions before receiving a response.  I wanted to get a memory keyer to lessen the burden of repeatedly sending my call and to also give me opportunities to do a bit of contesting this year.

If you want a good memory keyer, the K1EL Winkeyer is the natural choice to go with, so of course, I chose to acquire a 23 year old MFJ product instead.   

Take the road less traveled and you'll find wonders or fall in a ditch, I always say

The MFJ-493 is no longer sold but you'll frequently see them available used for reasonable prices and MFJ still sells a less featured variant (the MFJ-492).

Memory keyer at the the ready

Features

Typical of many memory keyers the MFJ-493 let's you store messages in up to 8 memories of 4,000 character each using your paddle, an external keyboard plugged into the back or a terminal program via the serial interface.  If you make a mistake while entering a message you can send 8-DITS and it will erase the previous word and send the last word in the message so editing is fairly easy.  Messages can be constructed from other memories, i.e. you can store your call in Memory #1 and then use "/1" in other messages to reference your call.  Repeats and timers are available within the messages as well.

Any of the 8 messages can be sent with the press of a button, although to send messages 4-8 you switch to the second bank of memories.

I won't list all the features because I think they are relatively common across memory keyers and I've posted a link to the manual later in the post, but I will mention that I enjoyed the ability to vary the character AND word spacing sent in messages.  So you can create "Farnsworth" type messages that sound (to my ears) far more natural than the typical "squashed" sounding CW sent from most memory keyers.  I demonstrate that in the video review.   I know a contester would never want to slow down the CW sent from his memory keyer but I have different priorities.

Most of the functions are clearly visible on the front panel so you don't need to refer to the manual to operate most features.  Some of the commands are not listed on the front panel so don't totally ignore the manual.

Back panel
The back panel sports a couple interesting ports.. an external keyboard interface and a serial port interface.  The external keyboard can of course be used to generate Morse code without a paddle and can make programming memories easier.

The serial port can be used with a terminal emulator like PuTTY set to:

  • 1200 baud
  • 8 data bits
  • 1 stop bit
  • no parity
  • xOn/xOff flow control.


If you power up the keyer while it's attached to a terminal emulator you can see some interesting information:
MFJ-493 MEMORY KEYER VERSION 1.1.2C.        COPYRIGHT MFJ ENTERPRISES, 1993.
TYPE "[help]" (USING BRACKETS AND LOWER CASE LETTERS) FOR ON LINE HELP INDEX.
[help]
HELP INDEX FOR MFJ-493 MEMORY KEYER
1.  TYPE [help-program] FOR HELP ON PROGRAMMING MESSAGES
2.  TYPE [help-transmit] FOR HELP ON SENDING MESSAGES
3.  TYPE [help-setup] FOR HELP ON CONFIGURING YOUR MFJ-493
4.  TYPE [help-list] FOR LIST OF ALL COMMANDS
[help-list]
HELP-LIST INDEX FOR MFJ-493 MEMORY KEYER
[help]           LISTS GENERAL TOPICS
[help-program]   LISTS MEMORY STORING INSTRUCTIONS
[help-transmit]  LISTS TRANSMITTING INSTRUCTIONS
[help-setup]     LISTS KEYER SETUP INSTRUCTIONS
[help-list]      LISTS ALL COMMANDS
[start#]         STARTS KEYER MESSAGE NUMBER # STORAGE ROUTINE
[stop]           ENDS KEYER MESSAGE STORAGE ROUTINE
[{#}]            MARKS FILE FOR ASCII UPLOAD TO MEMORY
[send#]          SENDS MESSAGE NUMBER #
[show#]          DISPLAYS MESSAGE NUMBER # CONTENTS
[co]             STARTS KEYER COMMAND MODE
Among other commands.  There are also commands for printing out the contents of the memories.
So the keyer has a sort of built-in manual if you connect it to a terminal.  Very full featured at used prices.

Using a terminal to the keyer via the serial port also displays everything you send with your key as well as allowing keyboard (terminal) input to the memories or allowing you to send code by typing in the terminal emulator.

Lastly regarding commands.. a useful command to know that's not on the front panel, is that you can reset the 493 to factory settings by holding the menu button down while turning it on.


Cool features not seen in other memory keyers

Two functions FCC Exam Practice and QSO Simulator are lots of fun.  The FCC Exam practice sends a standard FCC CW exam from back when code was required for license upgrades.  It varies up the messages but sends the standard elements required back then.  Good for practice.

But the super-cool feature is "QSO Simulator". This mode performs an interactive QSO with you.

Are band conditions getting you down?  No one answers your calls?  Have a QSO with your keyer!

I'll leave the video to do most of the explaining but basically, the keyer will listen to you send CQ and answer your call and then exchange information with you answering after the turn around.  You're expected to get the call it SENDS you correct or it won't answer you back.  If you send poor CW it makes raspberry sounds at you.  It's just a lot of fun to play around with and copy.

MFJ-493 "QSO Simulator" demonstration


Nits

A couple features that are completely useless are the "hand key" mode and the "semi-automatic-mode".   Once the hand-key mode is enabled you can use either paddle as a straight key but it is very unresponsive at anything over 5-10 wpm.  So keep your straight key wired into the output of this keyer.  Similarly the "semi-automatic" mode is supposed to simulate a bug, where the DITS are sent automatically but the DAHS are manual.  Well it's even worse than the hand-key mode, don't bother as it's for entertainment purposes only.

Another problem with this keyer is related to the weighting commands 'C' and 'W'.  If you have either of them set to a value other than zero you cannot accurately record a message into memory using the paddles.

I'd hoped to be able to run both my paddle and bug into the input of this keyer and switch it to hand mode when I wanted to use the bug and use it as a bug "de-scratcher" but it doesn't buffer the bug input and in hand key mode misses about a third of the DITS sent by a bug so no joy there.  I'll just keep using my old Ham-Keyer as my bug de-scratcher.

MFJ-493 Manual

Many thanks to Paul/N6MGN for sending me a copy of the manual and schematic for this keyer so I could share them.

View manual
Download manual

View Schematic
Download Schematic

So many connections

Adding this additional keyer finally made me break down and build a connection box for all my keys and rigs.  I have 4-5 CW keys on my desk at any given time and 3-4 radios.  Each of the two external keyers have female RCA jacks for output.  The Ham Keyer uses 2 independent 1/4" inputs for straight key and paddle while the MFJ-493 uses a 1/8" stereo plug for the paddle.  The Ham Keyer expects the DIT to be the tip of the plug and the MFJ (by default) expects the DIT to be the ring of the plug.

Arrrgh!

To top it off, each of my primary 3 radios expect different wiring from an external keyer.  
  • The Elecraft KX3 needs a 1/8" stereo plug with the ring terminal un-grounded
  • The TenTec Eagle needs a 1/8" stereo plug with the ring terminal grounded or a mono 1/8"
  • My TenTec Century/21 needs a 1/4" mono plug (my rig is modified, I believe a stock C21 needs a male RCA
So I took a project box drilled it for 5 phono jacks wired in various configurations for each of the rigs and keyer inputs.  I still can't leave the KX3 key plugged in when not in use because when that radio is turned off it presents a high impedance on the plug and makes the C21 think the key is down...  (nothing is ever simple) but now I don't have a bunch of 1/4" to 1/8" and stereo to mono plug connectors chained together like a box-cars on a train.


Video review

This video review demonstrates a few of the features and contains the same QSO in the video above at the end...


Summary

The MFJ-493 is a feature rich yet somewhat flawed keyer.  For the price I think it's a good buy but don't expect some of the more esoteric functions to work up to your expectations.


That's all for now

So lower your power and raise your expectations... and send your call a couple dozen times using a memory keyer

72/73
Richard AA4OO

Tuesday, November 14, 2017

Thank you for my signal report

3 numbers can mean a lot


QRP operators strive to make the most out of a little.  So when we receive a signal report it means a lot to us.  But the common signal report, given using the R-S-T System, seems often to be misunderstood by some amateur radio operators.

RST has 3 elements:
  • R stands for Readability.  How easy or difficult is it to copy the characters or words being sent on a scale from 1 to 5, with 1 meaning unreadable ranging up to 5 meaning perfectly copy-able.
  • S stands for Signal Strength.  How strong is the signal on a scale from 1 to 9, with 1 being barely perceptible up to 9, being extremely strong.
  • T stands for Tone.  This is only used to describe a CW signal's tone.  Given modern transceivers there are few cases where you'd send anything other than a 9 meaning perfect tone, devoid of ripple or modulation. You'll rarely hear a report with a Tone report other than 9, but if you hear ripple or modulation artifacts you may send lower numbers but it will likely just confuse the other operator.  If you hear chirp (a rising or falling tone) you may wish to append a 'C' to the RST to indicate that.
I want to concentrate on Readability and Signal strength.

Readability

I believe most of us are guilty of focusing on the signal strength portion of the report rather than readability.  But readability can convey a lot to the operator receiving the report.  

For instance if you have a lot of local noise or if the band is noisy due to magnetic disturbance or there's QRM or QRN readability may be difficult.  Similarly, if the operator is using poor technique and running letters or words together that affects readability.

It's possible that signal strength may be good or even moderately strong (6 or 7) but for some reason copy is difficult.  It would be worthwhile to send a 2 (Barely readable, occasional words distinguishable) or a 3 (Readable with considerable difficulty) for the 'R' portion of the signal report as in 359.  Then follow up with WITH QRM or WITH POOR SPACING, to make the other operator aware that you're having trouble copying.

I will occasionally have an operator send me a 3 for R but it seems to always be related to low signal strength.  If someone sends you a 3 or a 4 and it's not followed by an equally low signal strength number inquire as to the difficulty in readability.  It may be something you can correct on your end.

Signal

Signal seems obvious but it's not.  

I believe that many operators use the reading on their S-meter to report the Signal strength but different manufacturers calibrate their S-meters quite differently. The difference between S-units is supposed to be 6 dB but that's often not the case.  On many rigs the use of the preamp or the attenuator also effects the displayed S-meter reading.  So the S-meter is not an accurate reflection of what Signal strength is supposed to convey.  

My old Ten-Tec Century/21 doesn't even have an S-meter.  Neither do my homebuilt QRP radios.

So, what should we be using?  Well how about the actual meaning of the system:
  1. Faint—signals barely perceptible
  2. Very weak signals
  3. Weak signals
  4. Fair signals
  5. Fairly good signals
  6. Good signals
  7. Moderately strong signals
  8. Strong signals
  9. Extremely strong signals
Obviously this is a subjective report, but on my KX3 my S-meter may read 2 when the signal actually sounds Good (6), so I send a 6 even though the meter reads 2.  If I were to send the other station the S-meter reading of 2 they'd assume I'm barely copying them, because I sent them a 529.

I think you can start to see the point.  Use the system as it was designed, before radios had S-meters and the Signal report will have more meaning to the station receiving the report.

My Ten-Tec C21 doesn't have an S-meter but it does have AF and RF gain controls.  I will commonly run my AF gain at a high level and use the RF gain to control the volume of the received signal.  This increases the SNR (signal to noise) and gives me a relative gauge of how strong the sender is.  If I have my RF gain turned all the way down and still clearly hear the other station they have an extremely strong signal (9).  If I have to turn my RF gain all the way up just to copy then the signal is very weak, or faint (2 or 1).  In between those extremes I offer a relative report based on the signal strength  I  am hearing.

So, use the system as it was intended

So, reconsider how you give a signal report.  Think about the original intent of the R-S-T System and you'll be conveying far more information in your report that may help the other station know for certain how they are being heard.

I start most QSOs at QRP levels.  If the other station sends me a report that is below a 5 in readability or a signal strength 5 or below I change antennas or raise power, if I'm able, to make their copy of my station more pleasurable, but if they send me a 599 when they are barely copying me or losing me in QSB then how can I know to make a change?

Maybe this is a radical idea but for my own operation I will strive to start sending more accurate reports and help the other station truly know how they are being copied.


That's all for now...

So lower your power and raise your expectations

72/73
Richard, AA4OO

Monday, April 24, 2023

Yaesu Interface Cable SCU-28

 TX Relay, Power and TX REQ IN

R&L Electronics sent me a SCU-28 10-pin DIN cable by accident and were nice enough to let me keep it.  Consider shopping from those guys.  They offer great communication and good prices.

This cable is typically used to wire connections for an external amplifier.  I don't have an external amplifier but I wanted to make use of the +12v power and transmit relay for the protection relay I built for my SDR-Play a few years ago.


I had also read that the TX REQ IN pin could be used to switch the radio into a lower power tune mode for use with external tuners. The absence of a TUNE button for external tuners is one of my pet-peeves about the FT-DX10 so I was excited to have one.

Wiring the Break Out Box and TX-REQ-IN

So I used my last spare plastic project box, some female phono jacks and found a push-button that I'd cut off of some other project in my junk box and went to work.


I used some shrink wrap for the momentary switch for the TX-REQ-IN pin.


I wired up 3 phono jacks... One for the TX relay, another for the +12v out, and one for the ALC control in case I ever do get an amp.  I safed the other wires for future use inside the project box.


Partial Success

I connected the box and verified that I was getting power for the relay and that the Relay Switch operated


Unfortunately, the TX-REQ-IN does NOT do what it does with other Yaesu transceivers.  Pressing the button grounds the TX-REQ-IN - the radio does transmit a carrier in any mode (here I tested with LSB) but rather than transmitted a reduced power carrier as it's supposed to, it just transmits at whatever wattage the mode is currently set to.  In this case I had the power set to 50w into a dummy load and it transmitted the full 50w rather than a reduced power 10w or 20w carrier for tuning.  See the power out on the radio's display


In my opinion Yaesu screwed the pooch on this one.  I don't see any reason why they wouldn't operate like they do with their bigger brethren radios when the TX-REQ-IN is grounded.  Some subsequent forum searching turned up posts from others that confirmed that the FT-DX10 does not properly respond to that signal.

My Elecraft KX3 and Ten-Tec Eagle both have a "TUNE" button that sends a low power tuning signal regardless of what the current power setting is at and there's no reason that the FT-DX10 shouldn't do the same.  Having to dive into a menu to change the power setting for tuning an external matching unit is just silly in this day and age.

I have confirmed that my box is working the relay properly to my SDR-Play.  I reference the relay I built to protect the front-end of the SDR-Play in this post https://www.hamradioqrp.com/2017/02/spruce-up-basic-transceiver-with-sdr.html

That's all for now.


So lower your power and raise your expectations


Thursday, February 6, 2020

Space in Morse Code

Silence is Beautiful

The space between characters and words is just as important as properly forming the characters.


If you're rushing your characters the elements of one character will not be easily discerned from the next and the person your sending to will find it indecipherable and respond with a 73 and spin the dial.  I have a number of comments in my logs about operators who ran their characters and words together.  I tend to avoid those contacts down the log.

But, many of us, including myself, are guilty of rushing when we send, especially as a ragchew moves into the 3rd or 4th exchange.  I think the problem is that as the person sending the code, I know what I am sending and in the excitement of wanting to get out all the things I want to say and turn it over, I start to rush and begin compressing the space between my sent characters and words.  After all, it's very clear in my head what I'm sending, it must be just as clear to the listener, right?  Wrong.

RRFBCPYALLWXHRISSUNNYES88FRIGISIC756PRORUNNING100WINTODIPOLEUP66FTDESM8ERW8BJOK

The exchange above isn't far from reality and that's assuming the character spacing was good.  When the character spacing is rushed two characters become a different character or no character at all, and you sit there with your head tilted thinking "what in the world are they saying?"

Proper Space (Timing)

What is considered proper spacing?  Let's review some basics.  A DIT is counted as a single Morse Code element (think of it as a unit of time).  A DAH is counted as 3 times longer or 3 Morse Code elements (3 times the DIT time unit).  

Of course the length (time) of a sent DIT or DAH will change with the speed you are sending.  As the word per minute speed rises, the length of of DITs and DAHs decreases accordingly and vice-versa.  Unless you're using Farnsworth timing, but that's a different discussion...

Space between DITS and DAHS in a Character

Characters other than the E and T are made up of more than a single DIT or DAH.  Between each DIT and DAH making up a single character is space.  The space between each DIT and DAH making up a single character should be as long as a single Morse Code element... a DIT.  So there's a DIT's space of silence between every DIT and DAH in a character. 

"R" = DIT.DAH.DIT (where the '.' is the length of a DIT)

Space between characters within a Word

There should be 3 Morse Code elements of silence between each letter in a word, or silence the length of a DAH, at the speed you are sending.

"WORD" = W-O-R-D (where the '-' is the length of a DAH)

Space between Words

There should be 7 Morse Code elements of silence between each word you send.

"HERE<>ARE<>SOME<>WORDS" (where the '<>' is the length of a the M character)

The length of an "M" ??  Yes.  I was corrected about this in a video I made.  In that video I was counting the DITS and DAHS only, and said to count the inter-word space to be the length of the 'W' character because it is made of a DIT and two DAHS, but I was forgetting the space between the DITS and DAHS that make up the character.  A 'W' character contains 9 elements.  An 'M' contains 7 elements since it is 2 DAHS (3*2=6) plus the inter-character element that spaces them (1-element of silence) equals 7 Morse code elements.

How to Practice

If you use an electronic keyer it will take care of the inter-character spacing between the DITS and DAHS of your sent characters.  If you use a manual key you'll have to take care of that yourself.  You can practice by sending strings of DITS, listening to see if you are placing the same space between each DIT as the length of the DIT itself.  

To practice spacing letters in a word, get used to the length of a DAH (a 'T' character).  Send a T over and over making sure you have the space of the character and the space of silence equivalent.  This gets a bit more complicated with different characters.  An 'E' character is of course much shorter than a 'Z' character but you need to have the same amount of space after each before sending the next character.  I find that I tend to rush into the next character after sending a long character like an 'F 'or an 'L' and add too much space after short characters like an 'E' or 'T'.   If you use a decoder of some type it can be helpful in showing you timing mistakes.  Send into a decoder and see if it turns two of your characters into a different character (you rushed the timing), or see if it spaces the word out as if there's a word break (you're putting too much space between the letters).  It is a very humbling experience to send into a decoder.

Similar to working on letter spacing, spacing for words is potentially an even more important skill.  When we listen to Morse at speed the rhythmic sound of the characters in a word as a whole tends to tell our brain what we've heard.  If the next word is rushed then we don't process the first and miss the beginning of the next.  Practice sending the 'M' character at your preferred speed and get used to the amount of time it takes to send.  

One thing I've tried that works pretty well is setting the break-in timing of my transceiver to match the space I want between words.  At 20wpm the DIT length is between 50-60 milliseconds depending on the measurement you use.  So if I want to be sure I'm spacing properly I should have 7 time-units or 7*50 = 350 milliseconds break-in set in the transceiver.  Both my Elecraft KX3 and Ten-Tec Eagle support setting the break-in in milliseconds.  By being sure that I hear break-in occur between every word I know that I'm putting in a good minimum amount of spacing.  If I don't hear break-in occurring, it reminds me that I'm rushing my words.

When I hear break-in occur between every word I know that I'm putting in a good minimum amount of spacing

Conclusion

The silence you send is just as important as the signal.  Silence is golden


DE AA4OO


Saturday, March 26, 2016

The Eagle has landed

Ten-Tec Eagle -- A CW masterpiece

I've had the opportunity to bring another wonderful radio from Ten-Tec into the shack.  The Ten-Tec Eagle.

Ten-Tec Eagle HF transceiver
The Eagle is NOT a feature laden radio and using it is a bit quirky.  

There are no menus on the Eagle.  The dual-function buttons you see are what you get. The multi-knob allows adjustments for the various functions.

What it does have that is so common with the Ten-Tec line of radios is absolutely wonderful sounding audio and beautiful full QSK with no strange audio artifacts at full-break-in.  It is a pleasure to work weak stations.  This particular radio has three 4-pole filters for the IF at 2.4kHz, 600Hz and 300Hz.  They are automatically selected as the dedicated bandwidth knob is adjusted, resulting in smooth and clear filtering of CW stations.

I also have a Elecraft KX3 and while it has similar receiver specifications, listening to weak CW with it has a lot of digital artifacts that are not present on the Eagle.  I can work a weak station with the Eagle and not be fatigued at the end of the qso.

It also has a nice ATU capable of matching up to 10:1 SWR antennas and of course supports SSB.  It covers 160m-6m and can do FM if the 15kHz filter is installed.

Eagle beside its much older brother, the Ten-Tec Century/21

CW the way it was meant to be heard


The solar conditions have been extremely poor over the past week that I've used the rig and are likely to be this way for a few years to come.  It's nice to have a rig that makes these poor conditions still enjoyable.

If you love CW do yourself a favor and try a Ten-Tec.  They are pricey compared to other rigs and they do not come close competing on price-per-feature but Ten-Tec receivers make for amateur-radio bliss.

That's all for now

So lower your power and raise your expectations

72/73

Richard, AA4OO

Wednesday, January 25, 2017

Hard fought SKCC QSO using the Ten-Tec Century/21

Sometimes you need to move your QSO

My ever changing station configuration
Left to right - Elecraft KX3, Ten-Tec Century/21 with Ten-Tec Eagle on top, the MFJ 493 keyer on the right
4 keys - Navy Flameproof, Kent Hand Key, Vibroplex Bug, N3ZN QRP paddle
The Elecraft AF1 audio filter is sitting unused in front of the Century/21
After starting our QSO the ARRL QST program started right on top of us causing QRM that forced us to move to another frequency
My old Ten-Tec Century/21 is a lot of fun to use and its direct conversion receiver makes CW sound beautiful. But the frequency dial is fairly imprecise so when I asked the station to QSY up 1kHz finding him again was a bit of a challenge.  When I heard him I had to zero-beat him again to make sure I was on the correct side of the direct conversion receivers passband.

Enjoy the QSO and the QRM dodging...


Shooting this video

This video was a bit harder to shoot than what I normally do.  I usually place my camera to one side but I wanted to use my fisheye lens and shoot the QSO from above.  

While shooting I was straddling the tripod with the camera right in front of my face so I was reaching around the tripod to use my keys and get to my keyboard for logging.  It was a bit awkward, and in the video you'll see me bump the VFO while trying to operate the radio because I couldn't really see what I was doing.  It's always fun to add a level of difficulty while making these videos.


That's all for now...

So lower your power and raise your expectations

72/73
Richard AA4OO


Friday, February 19, 2016

1 Watt and a Wire... in the Attic

You can't always get what you want, but you try sometimes...

Recently I've dialed my normal 5 watts down to 1watt (one watt, singular) for all my contacts.  To throw some water on the fire I've decided to use my attic antenna which weaves all around my metal ductwork and electrical wiring.   Mostly this was to prove a point to myself but it may be enlightening to deed restricted hams that they can use a qrp radio and an attic antenna successfully.

Key lineup... Palm Single (paddle), Vibroplex Bug (circa 1970s), Kent Hand key

It only seems pointless until you try

Calling CQ with 1w QRPp into a poor attic antenna isn't as pointless as it would seem.  I didn't have to wait long when calling CQ before I got an answer most of the time.  

Now am I going to bust a pileup with 1 watt ?  Possibly not but I think that my assumptions about both how much power I need and how big an antenna I need are usually out of proportion with reality.

1 mighty watt

My assumptions are often incorrect

I made QSOs on 30m, 20m, 17m and 10m this morning all at 1 watt.  The solar conditions report was not really fantastic, especially for 10m.  Yet 1 watt through the attic antenna bagged the only DX I heard on 10m.  I had a couple of other multiple exchange contacts on 20m, 17m and one good old fashioned 25 minute long ragchew on 30m where I received a 599 report for my one watt from Bob (NR8M) in Ohio.  Admittedly, Bob was booming in and we had good propagation to each other.

http://www.hamqsl.com/solar.html

Video

The recording below was number 4 or 5 this morning.  I wanted to post this one because I was working another QRP station in Arkansas (K5EDM) and we did NOT have great propagation to each other.  He was running 5w while I was running 1w so it was QRP to QRPp.  In the video you can see that I'm using some of the KX3's tricks to pull the signal up because there was a lot of QSB and noise (note the GEOMAGNETIC FIELD UNSETTLED in the solar report).  

I had the volume maxed and was using the RF gain control mostly.  I eventually had to turn on the preamp which really washed me in noise but I dropped the RF gain more and eventually switched in the APF (audio peaking filter) which performed magic on this contact.  Often I find that APF doesn't help but this time it made a big difference.


That's all for now

So lower your power and raise your expectations

72/73
Richard N4PBQ