Friday, February 2, 2018

Noisy power supply -- Heathkit HP-13

Resurrecting a Heathkit HP-13

As seen in my previous post I've taken the dark plunge into the world of tube radios.  I want to start restoring my Heathkit HW-101, but before I can do that I must be able to power it.  As I previously wrote, I taken the road less travelled and got an old (circa 1965) HP-13 mobile power supply because I thought it would be nice to power the radio from a 12v source rather than mains. 

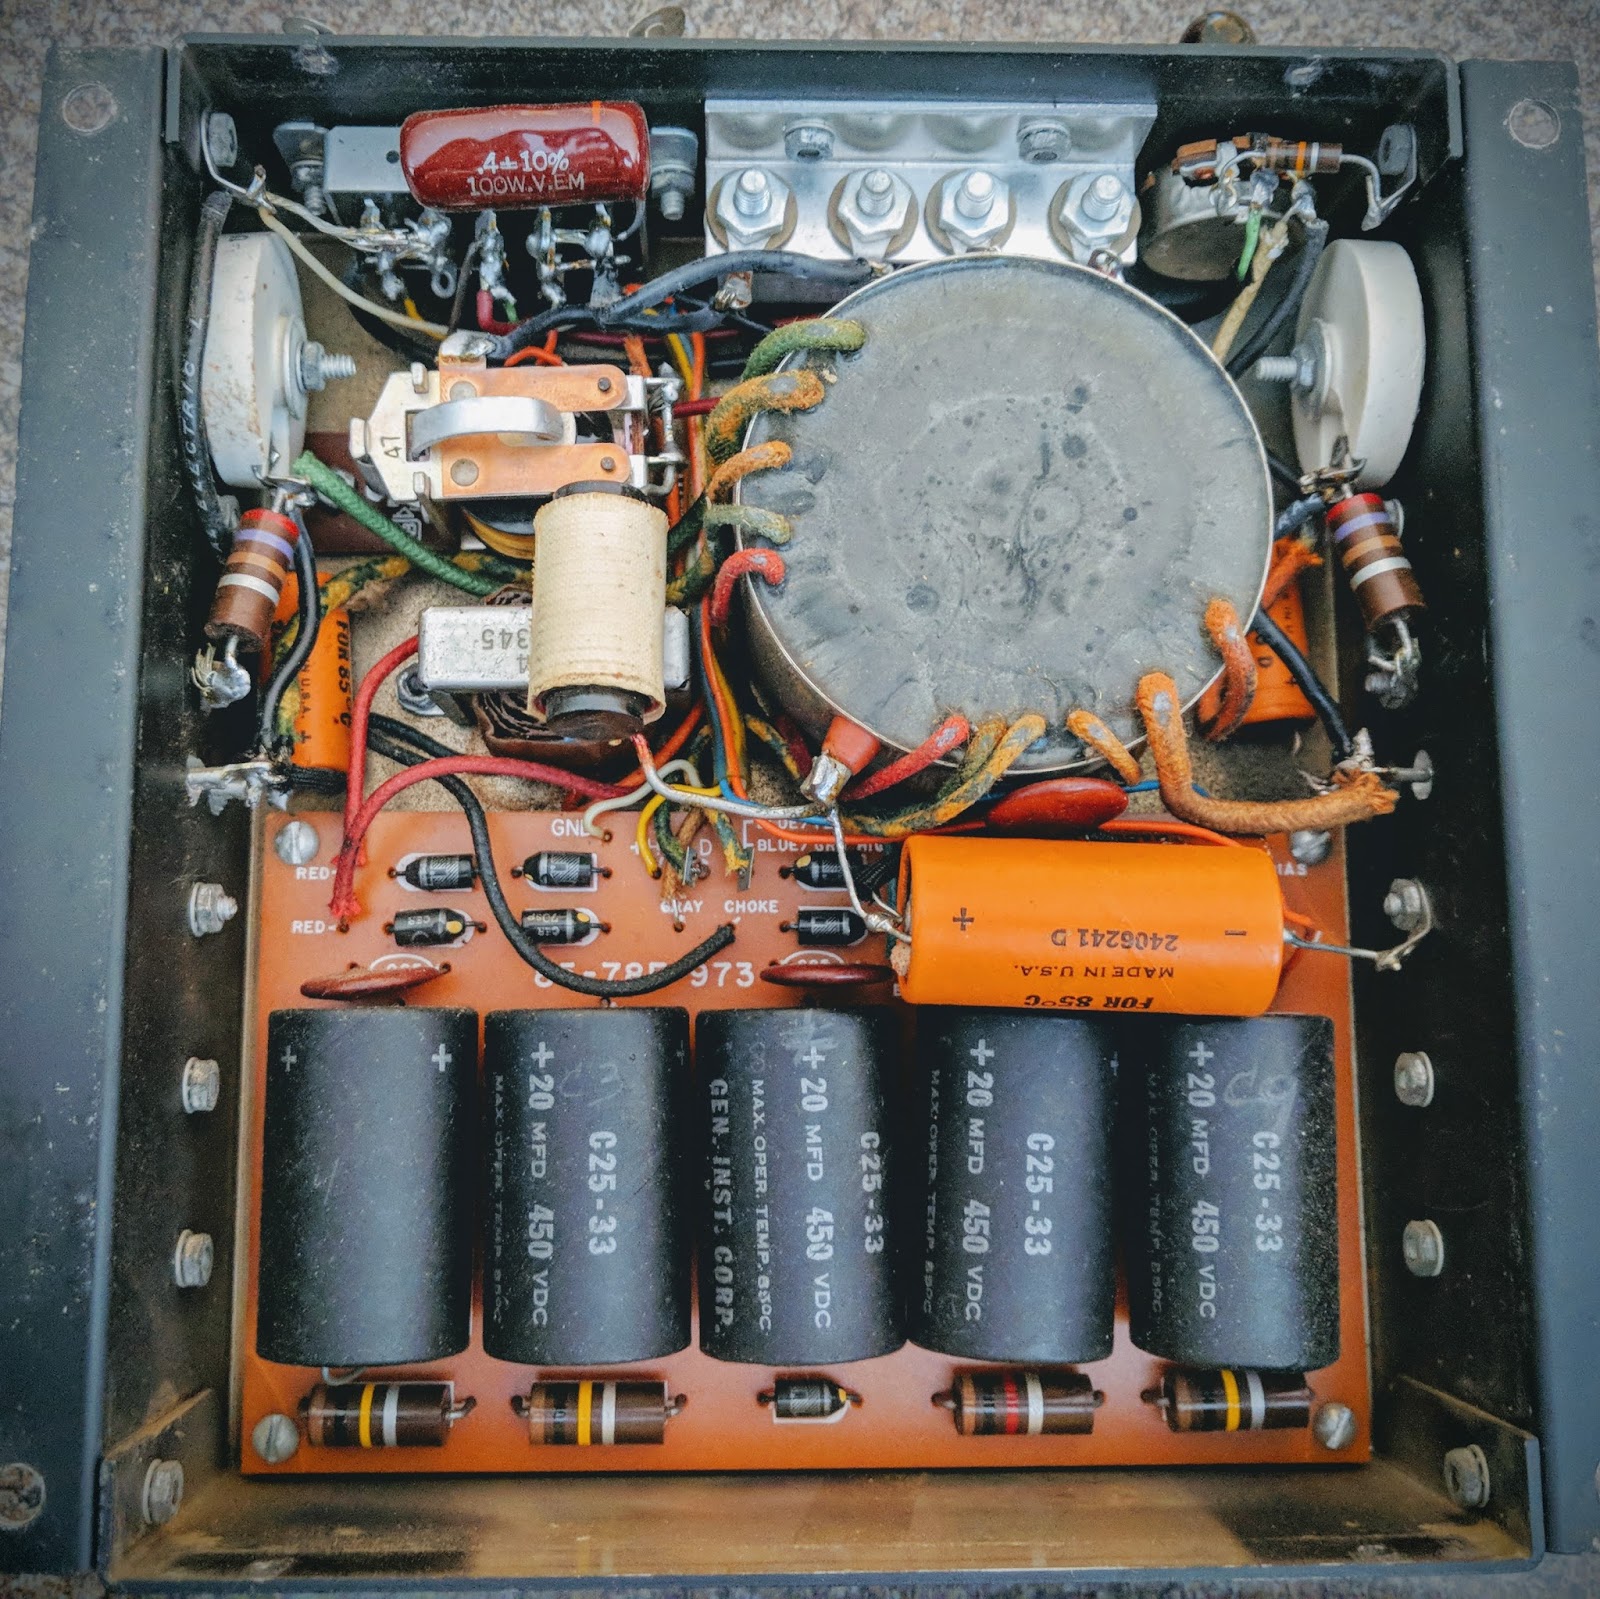
Unrestored HP-13 with broken solder joints and trashed capacitors


Well there seems to be a reason these don't seem very popular... I'll get to that.

I found a very nice article from RDF-Electronics regarding modernizing the HP-13 power supply.  That document includes the components and part numbers for everything you will need to restore your HP-13.  My parts arrived from Digi-key and I began snipping and desoldering the old component off the PC board.  The replacement electrolytic capacitors are all much smaller and have radial rather than axial leads.  That makes placing things on the board require a bit more creativity.  

HP-13 Schematic

The only truly problematic components to replace was replacing the twin positive axial lead electrolytic (C11) with two electrolytic capacitors (space issue) and replacing the C1 and C12 due to the tricky wiring around the transistors. 

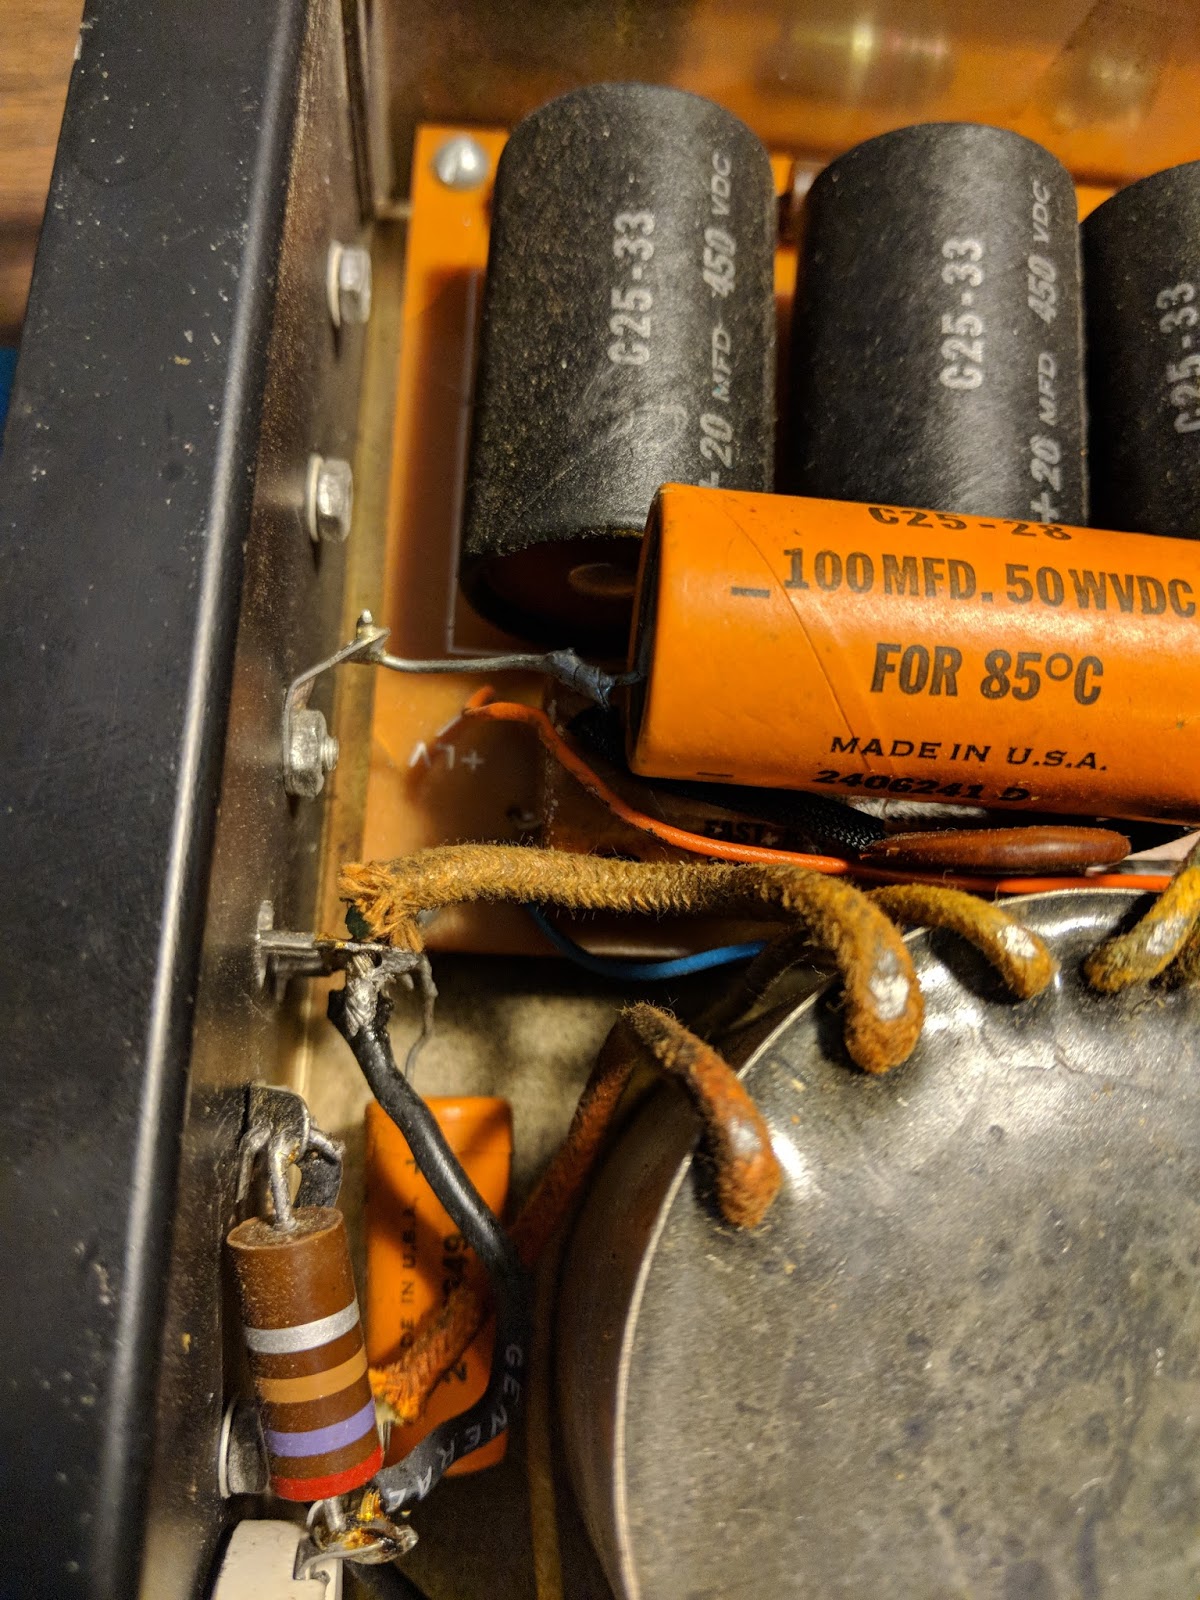
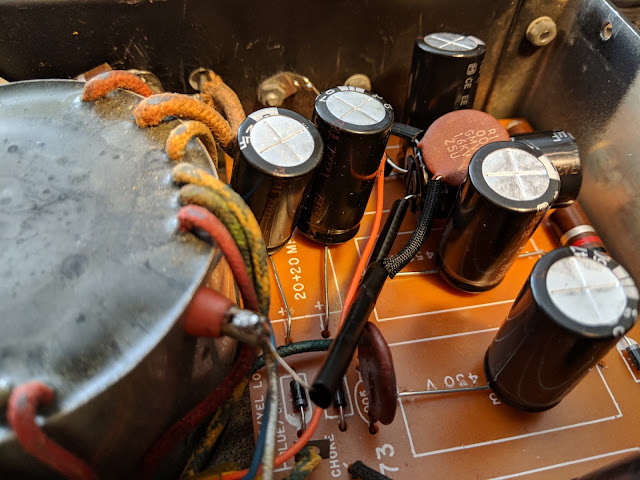
The orange cap on the left under the Q1 (C1) was tough to replace with a much smaller radial lead capacitor

The article suggested replacing the original 100 uF/50 V capacitor with a 4,700 uF/35V to better control ripple.  The article goes into quite a bit of detail concerning his testing of ripple using an oscilloscope.  Finding room for that big cap and it's accompanying filter disc required a bit of creativity as seen below, where it's laying on its side between two of the rectifier caps.

I will glue all the caps to the board before I put the power supply into service.


New capacitors and diodes

I replaced all the electrolytic caps and diodes.  The diodes might have been ok but they are blocking over 300 volts each and a single failure would let the smoke out for sure.
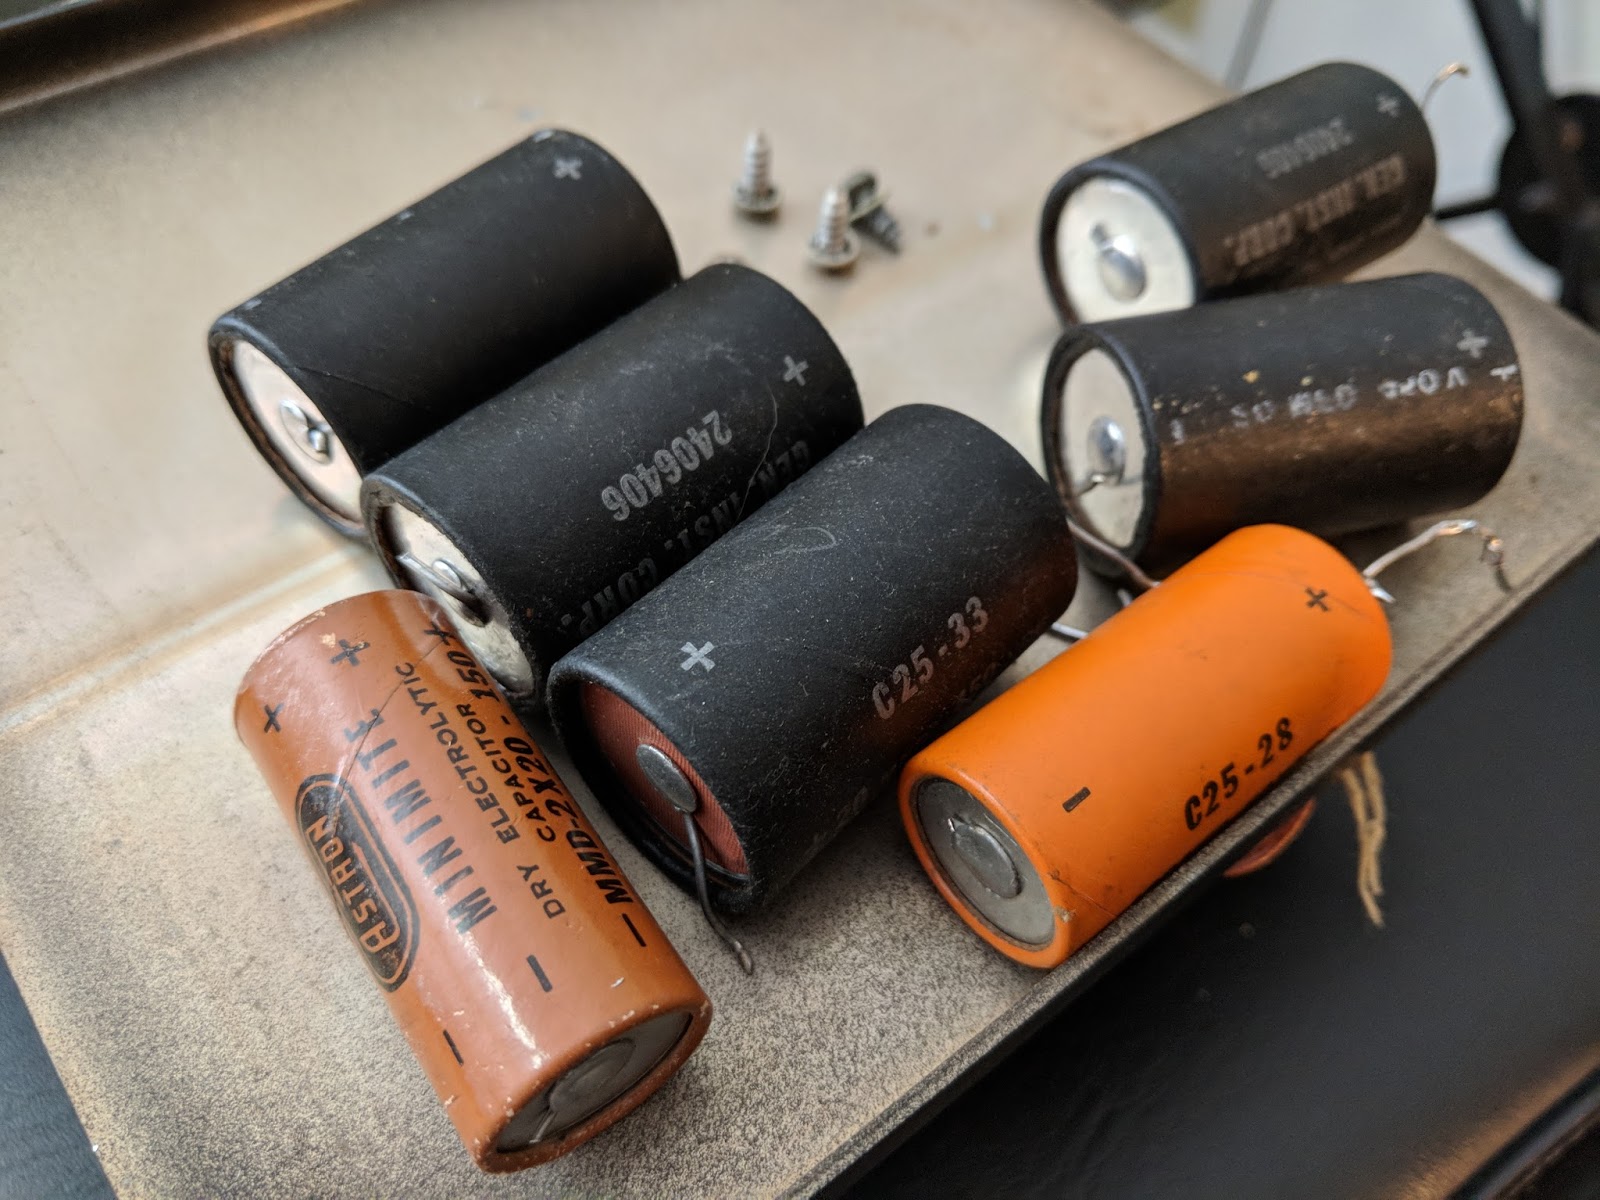
Out with the old

In with the new
All the resistors except one 100k 2 watt were ok.  So I only replaced that resistor.  The 1.6kv disc caps even measured ok.

The internals look a bit different now with the new caps standing up where the old, larger axial lead components laid flat.

Ready for testing

Testing

After performing resistance and continuity checks I buttoned it up for the test.

The Noise

I had no idea how audibly noisy this power supply would be.  The switching that occurs in the transformer creates a very loud whine.  I understand why hams would install these in the trunk.  There's no way you'd be able to stand this for long if it was sitting next to your station.

I have a longish intro in the video.  Skip towards the end to hear it powered up... turn your volume down when you see the "hearing protection" sign come up in the video.


Conclusions

This was a good learning experience.  I learned about high voltage transformers and got some practice restoring older equipment.  I practiced electrical safety and didn't kill myself, so I'm pleased about that.

I now have a power supply I could use from a sturdy 12v source if I needed it, BUT due to the noise in operation I'm going to look into restoring a HP-23 which runs off house mains (AC) and is mostly silent. 

I'll keep this on the shelf waiting for a day that I need to run the HW-101 mobile. 


That's all for now

73
Richard AA4OO

Saturday, January 27, 2018

Before transistors there were TUBES

Oh Boy, what have I gotten myself into

TUBES

A few months after re-entering the hobby in 2015 I picked up a TenTec Century/21.  It has been one of my favorite radios to operate and it is the most aesthetically pleasing radio I own.  After working with it's older (circa 1977) discrete transistorized technology and debugging some of it's problems, I became interested in building kits to learn about electronics.  I built a number of radio kits from different sources and some of the mini-module kits from Elecraft.

But I kept wondering about tube radios.  I came to the hobby well past the tube radio era and although I've read a lot about valve technology I didn't have any first hand experience.  I kept watching auctions for old Heathkits and Military radios and even bid on a few but lost the bids.

This past Christmas I decided that in 2018 I'd do something about this lingering interest.  I knew I'd eventually want to operate one mobile because, well that would certainly make it harder.  The power requirements of tubes are orders of magnitude greater than the QRP transistorized rigs I'd purchased.  Not knowing what I was doing I figured I could re-work an old Heathkit HP-13 power supply to give me what I'd need for an old military radio like the GRC-9.  

Heathkit HP-13a

Unsurprisingly, I was the only bidder and got one for $30 along with the odd grove power connectors that it uses. But I didn't do my research, and soon learned that the magic for these high voltage power supplies lies in the very specific design of their transformers.  In the case of the HP-13 it is operated much like an old military vibrator power supply with two germanium transistors acting as the vibrator.  Current is applied to to the core until it saturates and then a specific voltage determined by the number of turns is generated, the saturation drops the current to that winding and it starts over with the other transistor and the other winding.  I couldn't easily, or practically lower the 800v high voltage down to 580v required by the military radio I wanted and even the low voltage windings produce 300v and 250v respectively which is far beyond the 105v needed by the military radio.

I was warned off actually purchasing a military vibrator power supply due to a number of issues so I decided I'd start out with the radio this supply was designed for, a Heathkit HW-101.  All the electrolytic capacitors have to be replaced, and I plan to replace the diodes to be on the safe side as well.  I'm hoping the old transistors are still serviceable as I can't find any information on direct replacements for those.  I've ordered the replacement caps, diodes and resistors so I'll see how my refurb of this old power supply works out.  Working with voltages that can kill me is a bit daunting and I'm being very careful with the limited power-up tests I've performed so far.

Heathkit HW-101


That brings me to the newest arrival.  If you read my blog you know I like to do photography and it's no fun to photograph ugly radios so I kept watching auctions for HW-101s that were in good cosmetic condition.  I knew I'd have to do a good bit of refurbishment on whatever I ended up with but at least I could start with a "looker".

Heathkit HW-101
I plan, of course, to use it primarily for CW.  I'm aware that this radio is NOT particularly pleasant for CW due to the clacking relay as well as the poor filtering, but I've gotten accustomed to hearing lots of CW stations at once while working with my Century/21 so I think I can adapt.  All my other radios have full break-in so this will be a challenge to deal with, but I'm up to seeing what it was like for old time hams.

Crystal filter
While it has a crystal filter, 6dB of filtering at 400Hz will not offer much rejection to the out of band signals.  I guess I'll see. 

Admittedly this is far from QRP radio but I will endeavor to operate mobile at least a few times just for the experience.  I plan to operate at QRP levels to the extent I'm able.  There's just so much for me to learn.

If I don't maim myself or burn my house down, be on the lookout for posts as I resurrect the power supply and the old girl and get it on the air.  I have some ideas for photography involving glowing tubes that I think will be fun to figure out.  My bigger challenge is that I have no room for this thing at my operating position, so I'm trying to figure that out as well.

So drop me a line if you have restoration experience with these rigs.  Of course I'm reading what I can and look forward to learning how to align the transmit tubes and all the things I've had absolutely no experience with in the world of transistorized radios.


That's all for now

So warm up your tubes and raise your expectations

72/73
Richard AA4OO

Wednesday, January 24, 2018

Need help with a Ham Christmas QSO card

Too early to plan the Christmas QSO card?

Ok, so it's only January but Christmas is just around the corner and I need help with a verse to go with my 2018 Christmas QSO card.

It starts like this...

We three keys from ham shacks are,
Sending code that travels afar,
 
. . .

That's all I got.  Help me out.


Just a bit of silliness


So lower your power and raise your expectations

72/73
Richard, AA4OO


Thursday, January 18, 2018

Giant Blizzard! Not really, but my antenna is down

We aren't supposed to get this much snow in central NC

We received a remarkable amount of snow yesterday here in central NC, my antenna iced up and looked very pretty, then the wind picked up and my antenna fell down.  Boo-hiss !

My homebrew OCFD antenna is constructed from donated, surplus, lightweight doorbell type wire attached to a 4:1 current balun in a PVC tube with threaded nuts to hold each end of the dipole on top and a coax connector on the bottom.  An eyelet through the top of the balun suspends it all via some 10 year old dacron rope (dacron rope is amazing stuff), which is attached to the eave at the peak of my roof.

How, pray tell did I get the rope attached to the peak of roof 33 feet up in the air you ask, having no tall ladders or Spiderman abilities? I'm glad you asked... Well, the rope is tied inexpertly, using granny knots, to one side of an S-hook.  I use a cane-pole fishing rod as an extension with a piece of masking tape on the end lightly holding the S-hook. Then I precariously lean out my 3rd story window eight feet under the eave (don't try this at home) and "fish" the S-hook through a loop at the peak of the eave, that was installed there by my nice painter, many years ago.  Once the S-hook is in the loop, I tug on the fishing pole and the masking tape lets loose of the S-hook and the S-hook remains in the loop, holding a few feet of old dacron rope.  QRP-indeed !

This incarnation of the antenna was first installed November 2015.  In that time an ice storm drug it to the ground, and a tropical storm broke the mooring as well.

Amazing stuff, doorbell wire and old dacron rope.

That gleaming line of ice from right to left in the picture below used to be elevated a bit more

Even with my outdoor antenna down, I was able to make a contact on 80m last night using the 68'ish foot long doublet in my attic so wasn't completely incommunicado.  It shouldn't be hard to get the OCFD operational again.  A bit harder will be repairing the blueberry cage that collapsed under the weight of snow on top of the netting.

This antenna is designed to fail gracefully

I wanted to be sure that when the antenna was under stress it would relieve itself at the easiest place to repair.  The rope on the long end of offset dipole runs through a pulley attached, with a zip tie, at the top of a set of sturdy, stacked fiberglass tent poles.  The rope runs through the zip-tie attached pulley to a long, lightweight, spring (the kind used for a small fence gate) along with the pulley provides the strain relief when it's windy. The zip tie holding the pulley at the top of the pole is intentionally the weak link.  When the forces become too much the zip tie breaks and the long, heavy side of the antenna falls across the garden.  It's a simple matter to pull a section of the fiberglass pole loose, attach a new zip tie, and Bob's your uncle.

So when you design your next wire antenna, plan ahead for easy repair.


That's all for now...

So lower your power and raise your power... and antennas after they fall

72/73
Richard AA4OO

Sunday, January 7, 2018

Troublesome characters to copy in Morse Code

The trouble with DITS

KX3 Displaying some sent code and a Palm Single paddle in front, magnetically attached to a steel base

As I've learned the code one problem area, early on, was dealing with words that started with characters that were all DITS.  I'm probably not alone in having my puny brain overloaded when I am trying to head copy words that start with DITS.  I would panic because the all-dits character would fly by and I'd get fixated on trying to figure out what that was and miss the rest of the word.

To overcome DIT panic, I started training on the all DIT characters of E, I, S and H

Using https://lcwo.net/  I'd configure it to send only those characters, and practice them alone.  Then I started creating words that began with DIT characters and I'd practice recognizing them.

After two and half years I still get tripped up on occasion but I'm doing much better.  

I also like to practice sending DITS.  The following sentence is fun to practice: "SHE IS 55 ES IS HIS SISTER"


So how do you deal with DIT overload?  


That's all for now.
So lower your power and raise your expectations...

72/73
de Richard AA4OO

Saturday, December 30, 2017

Don't forget -- Straight Key Night 2018 is tomorrow !

Straight Key Night -- 2018

Don't forget January 1st, 2018 starting 00:00 GMT (7pm EST Dec 31) is the start of Straight Key Night 2018.  Bring your tired, old equipment on-air and mash your favorite mechanical key.  This is not a contest, just an opportunity to make lots of fun QSOs.

I'll be on the air with my 1977 Century/21 using my Junker Straight key and Standard Vibroplex Bug.


ARRL has details on their website... http://www.arrl.org/straight-key-night

Video from 2018 SKN

If you hang in there until the 2:08 mark you'll see my new, spiffy, dual camera angle recording method that I plan to use in all my videos.


So, lower your power, and raise your expectations...

72/73
Richard AA4OO

Video recording woes

Getting the audio right shouldn't be this hard...

I've spent a considerable amount of time lately creating machine generated Morse code videos for copy practice.

I've created videos of the top 100 Words, 500 Words and today, the top 100 most common words in a QSO, at different speeds.  I'm machine generating rather than keying them by hand because I would make too many mistakes.  I do this through my memory keyer connected to the computer via a terminal application and capture the text being sent along with the audio.

Getting the audio right has been hard. When I record screen captures on my PC it wants the audio to be recorded at 44 kHz but when I transfer that to a Mac to use my video editing software, it expects the audio to be recorded it 48 kHz, and converting the audio in the video just doesn't work well.  I use an H2 USB mic for the recording.  If I set the mic and the PC screen capture software to 48 kHz I get no audio. So I have had to record at 44 kilohertz on the PC. I'm sure there's better screen capture software that could be used on the PC but I haven't been able to find it for free. I guess I'm too cheap.

This has caused my videos to have popping noises in the transferred audio. While I've tried to fix it during the editing process, it still sounds bad to me.

So, you may wonder why haven't I just recorded the videos on a Mac from the beginning rather than using a PC?  Well, I haven't been able to get the OSX terminal application to talk to my 1990's MFJ Super Memory keyer via the serial cable. For some reason my Mac doesn't have a driver for the usb dongle I used to talk to the old memory keyer but my PC does. I searched a bit more and found a non-free terminal application that will let me connect to this serial cable.  Now I connect from the Mac and capture the keyer output.  I'll spend hundreds of dollars on ham gear but ask me to shell out $30 for computer software and I balk.  And after all, I'm a software developer, shame on me.

So, starting today, my new videos should have improved audio and be at a higher resolution than previous videos recorded from the PC.  

These practice Morse code videos seem to be popular with folks, so I hope they're helping people. They're a lot of work but I guess they're worth it.


That's all for now...

So lower your power, and raise your expectations

Richard AA4OO 
http://www.hamradioqrp.com